How and Where to Buy LTO Network (LTO) – Detailed Guide
- What is LTO?
- Step 1: Register on Fiat-to-Crypto Exchange
- Step 2: Buy BTC with fiat money
- Step 3: Transfer BTC to an Altcoin Exchange
- Step 4: Deposit BTC to exchange
- Step 5: Trade LTO
- Last Step: Store LTO securely in hardware wallets
- Other useful tools for trading LTO
- Frequently Asked Questions
- Latest News for LTO
- LTO Price Prediction and Price Movement
What is LTO?
What Is LTO Network (LTO)?
LTO Network has established itself as Europe’s leading blockchain with strong real-world usage. It was founded on B2B enterprise solutions such as decentralized workflows, data & document verification and authentication. In 2021, LTO Network’s COBALT mainnet update expanded this solid base with the addition of Decentralized Identifiers (DID) and Verifiable Credentials (VC), putting LTO Network on the road of becoming a true layer-1 blockchain. In turn, Decentralized Identities and Verifiable Credentials are at the core of LTO Network’s newest focus; NFT2.0 technology, where people truly own and manage their NFTs in a decentralized way.
By utilizing its hybrid (2-layer) approach, LTO Network is natively GDPR compliant. This ensures easy compliance for companies around the world with ever-increasing privacy laws. Because of this, LTO Network enables developers and businesses to build Privacy Aware Decentralized Apps (PADA) and offers many unique opportunities for projects to explore.
Immediate plans for LTO Network include NFT2.0, decentralized identities/verifiable credentials driving KYC, expansions on already established projects and much more.
LTO Network Tech
LTO Network launched their mainnet in January 2019. It is a hybrid blockchain platform with a public permissionless layer and a private layer acting as private miniature blockchains for the parties involved in the process. Originally a fork from WAVES, LTO Network has been heavily modified and expanded upon for decentralized workflows and business process automatization. It continues to evolve and develop solutions to bridge observed gaps between the real world and the cryptospace, aiming to be a cross-chain base layer for distributed and collaboration dApps like Chainlink, origin trail, the graph, etc..
Multi-cypher
LTO Network has always prioritized integration with existing applications, which requires flexibility. Typically, blockchains support one cryptographic algorithm ("cipher") for signing. LTO Network utilizes the ED25519 standard.
While ED25519 is a common and well-supported standard, there are other algorithms that are also commonly used. Decentralized Identities allow for a whole range of ciphers, but often only a single one can be used due to limitation of the underlying layer.
Not LTO Network. In addition to the ED25519 standard, LTO Network also supports ECDSA with two curves.
- secp256r1: a NIST standard, commonly used in applications, as well as SSL certificates.
- secp256k1: a curve that is commonly used by blockchains, notably Bitcoin and Ethereum, but rarely used outside the world of cryptocurrencies.
With multi-cipher support people can now use an Ethereum public / private key set to sign transactions on LTO Network, or as a Decentralized Identity verification method.
Significant updates to LTO Network Mainnet
The following updates have been introduced to LTO Network:
- 2019 Update - Smart Accounts
- 2020 Update - Associations
- 2021 Update - Cobalt
How Is the LTO Network Secured?
The LTO Network is fully compliant with the European Union’s GDPR data protection law. The hybrid LTO framework allows private blockchains to be as scalable as possible while still having the security characteristics of the already widespread public blockchains. LTO Network is secured by the proof-of-stake (PoS) consensus algorithm.
Who Are the Founders of LTO Network?
Firm24 initially began developing LTO Network as LegalThings One in 2014. In 2017, it decided to add blockchain to the product and rebrand it to LTO Network.
-
CEO: Rick Schmitz is an experienced entrepreneur and co-founder of LTO Network. Prior to that, he worked in private equity and mergers & acquisitions at Deloitte and PwC.
-
CFO: Martijn Migchelsen is CFO, COO and co-founder of LTO Network. Previously, he worked as a corporate finance consultant at PwC.
-
Lead Architect: Arnold Daniels is co-founder and lead architect of the project. Arnold has extensive experience in open-source development and leads the core development team that is focused on building the platform that is LTO Network. Before LTO Network, Daniels worked as a lead software engineer at Cloud9.
-
CTO: Sven Stam is the CTO of LTO Network. He has a master's degree in artificial intelligence and has been in the industry for over 15 years.
What Makes LTO Network (LTO) Unique?
The two key features of LTO Network are easy-to-use live contracts and the implementation of the hybrid blockchain mechanism with anchorage.
The live contracts allow parties to create mutually beneficial agreements in real-time. When the parties come to an agreement and launch a live contract, the LTO parent system creates a special private blockchain in order to record the history of events and the contract’s current state.
When the agreement is fulfilled, one of the parties sends a response to the blockchain, and the other signs it, allowing the node to confirm that the action has taken place. All contract data is available only to its parties.
Live contracts allow users to register actions, add/remove participants and record discussions on the blockchain. They also make it possible to resolve conflicts and insert sub-processes within the framework of an existing agreement.
The blockchain functionality is divided into two layers: public and private. The private layer is designed for efficient collaboration, data exchange and process automation. In turn, the public layer provides high-level security, thanks to distributed nodes and a reward system.
Related Pages:
- Learn more about Decentralized Identity on Alexandria.
- Learn more about Non-fungible-token (NFT) on Alexandria.
- Understanding Decentralized Identities
- Understanding Verifiable Credentials
- Decentralized Identities for DeFi? Definitely!
- The bigger picture with Decentralized Identities
How Many LTO Network (LTO) Coins Are There in Circulation?
LTO tokens, based on Ethereum’s ERC-20 standard, provide liquidity and serve as a bridge for LTO Network customers. LTO can be used as placement on the network, to pay for transactions, or be passively retained for speculative purposes. Its circulating supply is 291,959,255 tokens as of November 2021.
There are four types of token holders: integrators and partners who keep the network operational and receive project coins as a reward; clients who use the chain and/or live contracts for transactions; passive stakers — private users who provide their technical capabilities to confirm transactions on the blockchain; inactive holders who are not part of the community and invest in the token for the purpose of future earnings.
Where Can You Buy LTO Network (LTO)?
LTO can be traded on the following exchanges and more:
- Binance
- Kucoin
- AscendEX
- Bitrue
- Uniswap (V2)
- Gate.io
- PancakeSwap
- Bitvavo
- Omgfin
LTO was first tradable on 5th Feb, 2019. It has a total supply of 426,204,670.1,724,553. As of right now LTO has a market capitalization of USD $141,878,658.85. The current price of LTO is $0.284 and is ranked 443 on Coinmarketcap and has recently surged 25.34 percent at the time of writing.
LTO has been listed on a number of crypto exchanges, unlike other main cryptocurrencies, it cannot be directly purchased with fiats money. However, You can still easily buy this coin by first buying Bitcoin from any fiat-to-crypto exchanges and then transfer to the exchange that offers to trade this coin, in this guide article we will walk you through in detail the steps to buy LTO.
Step 1: Register on Fiat-to-Crypto Exchange
You will have to first buy one of the major cryptocurrencies, in this case, Bitcoin (BTC). In this article we will walk you through in details two of the most commonly-used fiat-to-crypto exchanges, Uphold.com and Coinbase. Both exchanges have their own fee policies and other features that we will go through in detail. It is recommended that you try both of them and figure out the one that suits you best.
Select Fiat-to-Crypto Exchange for details:
- UpHold

Being one of the most popular and convenient fiat-to-crypto exchanges, UpHold has the following advantages:
- Easy to buy and trade among multiple assets, more than 50 and still adding
- Currently more than 7M users worldwide
- You can apply for UpHold Debit card where you can spend the crypto assets on your account like a normal debit card! (US only but will be in the UK later)
- Easy to use mobile app where you can withdraw fund to a bank or any other altcoin exchanges easily
- No hidden fees and any other account fees
- There are limited buy/sell orders for more advanced users
- You can easily set up recurring deposits for Dollar Cost Averaging (DCA) if you intend to hold cryptos long term
- USDT, which is one of the most popular USD-backed stablecoins (basically a crypto that is backed by real fiat money so they are less volatile and can be treated almost as the fiat money it's pegged with) is available, this is more convenient if the altcoin you intend to buy has only USDT trading pairs on the altcoin exchange so you don't have to go through another currency conversion while you buy the altcoin.
Type your email and click 'Next'. Make sure you provide your real name as UpHold will need it for account and identity verification. Choose a strong password so that your account isn't vulnerable to hackers.
You will receive a confirmation email. Open it and click on the link within. You will then be required to provide a valid mobile number to set up two-factor authentication (2FA), it is an extra layer to the security of your account and it is highly recommended that you keep this feature turned on.
Follow the next step to finish your identity verification. These steps are a bit daunting especially when you are waiting to buy an asset but just like any other financial institutions, UpHold is regulated in most countries such as the US, the UK and the EU. You can take this as a trade-off to using a trusted platform to make your first crypto purchase. Good news is that the whole so-called Know-Your-Customers (KYC) process is now fully automated and it shouldn't take more than 15 minutes to finish.
Step 2: Buy BTC with fiat money
Once you finished the KYC process. You will be asked to add a payment method. Here you can either choose to provide a credit/debit card or use a bank transfer. You may be charged higher fees depending on your credit card company and the volatile prices when using cards but you will also make an instant purchase. While a bank transfer will be cheaper but slower, depending on the country of your residence, some countries will offer instant cash deposit with low fees.
Now you are all set, on the 'Transact' screen under the 'From' field, select your fiat currency, and then on the 'To' field choose Bitcoin, click preview to review your transaction and the click confirm if everything looks good... and congrats! You've just made your first crypto purchase.
Step 3: Transfer BTC to an Altcoin Exchange
Select altcoin exchanges:
- Gate.io

- BitMart

- KuCoin

- Binance

- PancakeSwap

- PancakeSwap

But we are not done yet, since LTO is an altcoin we need to transfer our BTC to an exchange that LTO can be traded, here we will use Gate.io as our exchange. Gate.io is a popular exchange to trade altcoins and it has a large number of tradable altcoins pairs. Use the link below to register your new account.
Gate.io is an American cryptocurrency exchange that launched 2017. As the exchange is American, US-investors can of course trade here and we recommend US traders to sign up on this exchange. The exchange is available both in English and Chinese (the latter being very helpful for Chinese investors). Gate.io’s main selling factor is their wide selection of trading pairs. You can find most of the new altcoins here. Gate.io also demonstrates an impressive trading volume. It is almost every day one of the top 20 exchanges with the highest trading volume. The trading volume amounts to approx. USD 100 million on a daily basis. The top 10 trading pairs on Gate.io in terms of trading volume usually have USDT (Tether) as one part of the pair. So, to summarize the foregoing, Gate.io’s vast number of trading pairs and its extraordinary liquidity are both very impressive aspects of this exchange.
After going through a similar process as we've done before with UpHold, you will be advised to set up 2FA authentication as well, finish it as it adds extra security to your account.
Step 4: Deposit BTC to exchange
Depends on the policies of the exchange you might be required to go through another KYC process, this should usually take you from 30 minutes to possibly a few days maximum. Though the process should be straight-forward and easy to follow. Once you're done with it you should have full access to your exchange wallet.
If this is your first time making a crypto deposit, the screen here may look a bit scary. But don't worry, it's basically simpler than making a bank transfer. At the box on the right, you will see a string of random numbers saying 'BTC address', this is a unique public address of your BTC wallet at Gate.io and you can receive BTC by giving this address to the person to send you the funds. Since we are now transferring our previously bought BTC on UpHold to this wallet, click on 'Copy Address' or right-click on the full address and click copy to grab this address to your clipboard.
Now head back to UpHold, go to the Transact screen and click on BTC on the "From" field, choose the amount you wan to send and on the "To" field choose BTC under "Crypto Network", then click "Preview withdraw".
On the next screen, paste the wallet address from your clipboard, for security consideration you should always check if both addresses are matching. It is known that there are certain computer malware that would alter the content in your clipboard into another wallet address and you will be essentially sending funds to another person.
After reviewing, click 'Confirm' to proceed, you should receive a confirmation email instantly, click on the confirmation link in the email and your coins are on the way to Gate.io!
Now go back to Gate.io and head to your exchange wallets, don't worry if you haven't seen your deposit here. It is probably still being verified in the blockchain network and it should take a few minutes for your coins to arrive. Depending on the network traffic condition of the Bitcoin network, during busy times it may take even longer.
You should receive a confirmation notification from Gate.io once your BTC has arrived. And you are now finally ready to purchase LTO!
Step 5: Trade LTO
Go back to Gate.io, then go to 'Exchange'. Boom! What a view! The constantly flicking figures might be a bit scary, but relax, let's get our heads around this.
In the right column there is a search bar, now make sure "BTC" is selected as we are trading BTC to altcoin pair. Click on it and type in "LTO", you should see LTO/BTC, select that pair and you should see a price chart of LTO/BTC in the middle of the page.
Below there is a box with a green button that says "Buy LTO", inside of the box, choose the "Market" tab here as that is the most straight-forward type of buying orders. You can either type in your amount or choose what portion of your deposit you would like to spend on buying, by clicking on the percentage buttons. When you have confirmed everything, click "Buy LTO". Voila! You have finally bought LTO!
But we are not done yet, since LTO is an altcoin we need to transfer our BTC to an exchange that LTO can be traded, here we will use BitMart as our exchange. BitMart is a popular exchange to trade altcoins and it has a large number of tradable altcoins pairs. Use the link below to register your new account.
BitMart is a crypto exchange from the Cayman Islands. It became available to the public in March 2018. BitMart has a truly impressive liquidity. At the time of the last update of this review (20 March 2020, right in the middle of the crisis with COVID-19), BitMart’s 24 hour trading volume was USD 1.8 billion. This amount placed BitMart on place no. 24 on Coinmarketcap’s the list of exchanges with the highest 24 hour trading volumes. Needless to say, if you start trading here, you will not have to worry about the order book being thin. Many exchanges does not allow investors from USA as customers. As far as we can tell, BitMart is not one of those exchanges. Any US-investors interested in trading here should in any event form their own opinion on any issues arising from their citizenship or residency.
After going through a similar process as we've done before with UpHold, you will be advised to set up 2FA authentication as well, finish it as it adds extra security to your account.
Step 4: Deposit BTC to exchange
Depends on the policies of the exchange you might be required to go through another KYC process, this should usually take you from 30 minutes to possibly a few days maximum. Though the process should be straight-forward and easy to follow. Once you're done with it you should have full access to your exchange wallet.
If this is your first time making a crypto deposit, the screen here may look a bit scary. But don't worry, it's basically simpler than making a bank transfer. At the box on the right, you will see a string of random numbers saying 'BTC address', this is a unique public address of your BTC wallet at BitMart and you can receive BTC by giving this address to the person to send you the funds. Since we are now transferring our previously bought BTC on UpHold to this wallet, click on 'Copy Address' or right-click on the full address and click copy to grab this address to your clipboard.
Now head back to UpHold, go to the Transact screen and click on BTC on the "From" field, choose the amount you wan to send and on the "To" field choose BTC under "Crypto Network", then click "Preview withdraw".
On the next screen, paste the wallet address from your clipboard, for security consideration you should always check if both addresses are matching. It is known that there are certain computer malware that would alter the content in your clipboard into another wallet address and you will be essentially sending funds to another person.
After reviewing, click 'Confirm' to proceed, you should receive a confirmation email instantly, click on the confirmation link in the email and your coins are on the way to BitMart!
Now go back to BitMart and head to your exchange wallets, don't worry if you haven't seen your deposit here. It is probably still being verified in the blockchain network and it should take a few minutes for your coins to arrive. Depending on the network traffic condition of the Bitcoin network, during busy times it may take even longer.
You should receive a confirmation notification from BitMart once your BTC has arrived. And you are now finally ready to purchase LTO!
Step 5: Trade LTO
Go back to BitMart, then go to 'Exchange'. Boom! What a view! The constantly flicking figures might be a bit scary, but relax, let's get our heads around this.
In the right column there is a search bar, now make sure "BTC" is selected as we are trading BTC to altcoin pair. Click on it and type in "LTO", you should see LTO/BTC, select that pair and you should see a price chart of LTO/BTC in the middle of the page.
Below there is a box with a green button that says "Buy LTO", inside of the box, choose the "Market" tab here as that is the most straight-forward type of buying orders. You can either type in your amount or choose what portion of your deposit you would like to spend on buying, by clicking on the percentage buttons. When you have confirmed everything, click "Buy LTO". Voila! You have finally bought LTO!
But we are not done yet, since LTO is an altcoin we need to transfer our BTC to an exchange that LTO can be traded, here we will use KuCoin as our exchange. KuCoin is a popular exchange to trade altcoins and it has a large number of tradable altcoins pairs. Use the link below to register your new account.
KuCoin is a cryptocurrency exchange based in the Seychelles (previously Hong Kong). Launched in September 2017, KuCoin claims to have 5 million users from over 200 countries and regions. Often known as the People’s Exchange, KuCoin now offers crypto-related services like crypto-to-crypto, fiat-to-crypto, futures trading, staking, lending and so forth. The exchange has one of the world’s most impressive trading pair selections, with more than 250 supported coins and 440 trading pairs. KuCoin was backed by two giant traditional venture capitals when launching - IDG Capital and Matrix Partners. The exchange also announced a USD 20 million round A funding from them at the end of 2018.US-investors are not listed as prohibited from trading. If you are a US-investor, however, you should still always analyse yourself whether your home state imposes any obstacles for your foreign cryptocurrency trading.
After going through a similar process as we've done before with UpHold, you will be advised to set up 2FA authentication as well, finish it as it adds extra security to your account.
Step 4: Deposit BTC to exchange
Depends on the policies of the exchange you might be required to go through another KYC process, this should usually take you from 30 minutes to possibly a few days maximum. Though the process should be straight-forward and easy to follow. Once you're done with it you should have full access to your exchange wallet.
If this is your first time making a crypto deposit, the screen here may look a bit scary. But don't worry, it's basically simpler than making a bank transfer. At the box on the right, you will see a string of random numbers saying 'BTC address', this is a unique public address of your BTC wallet at KuCoin and you can receive BTC by giving this address to the person to send you the funds. Since we are now transferring our previously bought BTC on UpHold to this wallet, click on 'Copy Address' or right-click on the full address and click copy to grab this address to your clipboard.
Now head back to UpHold, go to the Transact screen and click on BTC on the "From" field, choose the amount you wan to send and on the "To" field choose BTC under "Crypto Network", then click "Preview withdraw".
On the next screen, paste the wallet address from your clipboard, for security consideration you should always check if both addresses are matching. It is known that there are certain computer malware that would alter the content in your clipboard into another wallet address and you will be essentially sending funds to another person.
After reviewing, click 'Confirm' to proceed, you should receive a confirmation email instantly, click on the confirmation link in the email and your coins are on the way to KuCoin!
Now go back to KuCoin and head to your exchange wallets, don't worry if you haven't seen your deposit here. It is probably still being verified in the blockchain network and it should take a few minutes for your coins to arrive. Depending on the network traffic condition of the Bitcoin network, during busy times it may take even longer.
You should receive a confirmation notification from KuCoin once your BTC has arrived. And you are now finally ready to purchase LTO!
Step 5: Trade LTO
Go back to KuCoin, then go to 'Exchange'. Boom! What a view! The constantly flicking figures might be a bit scary, but relax, let's get our heads around this.
In the right column there is a search bar, now make sure "BTC" is selected as we are trading BTC to altcoin pair. Click on it and type in "LTO", you should see LTO/BTC, select that pair and you should see a price chart of LTO/BTC in the middle of the page.
Below there is a box with a green button that says "Buy LTO", inside of the box, choose the "Market" tab here as that is the most straight-forward type of buying orders. You can either type in your amount or choose what portion of your deposit you would like to spend on buying, by clicking on the percentage buttons. When you have confirmed everything, click "Buy LTO". Voila! You have finally bought LTO!
But we are not done yet, since LTO is an altcoin we need to transfer our BTC to an exchange that LTO can be traded, here we will use Binance as our exchange. Binance is a popular exchange to trade altcoins and it has a large number of tradable altcoins pairs. Use the link below to register your new account.
Binance is a popular cryptocurrency exchange which was started in China but then moved their headquarters to the crypto-friendly Island of Malta in the EU. Binance is popular for its crypto to crypto exchange services. Binance exploded onto the scene in the mania of 2017 and has since gone on to become the top crypto exchange in the world. Unfortunately, Binance does not allow US investors so we recommend you to sign up on other exchanges we recommend on this page.
After going through a similar process as we've done before with UpHold, you will be advised to set up 2FA authentication as well, finish it as it adds extra security to your account.
Step 4: Deposit BTC to exchange
Depends on the policies of the exchange you might be required to go through another KYC process, this should usually take you from 30 minutes to possibly a few days maximum. Though the process should be straight-forward and easy to follow. Once you're done with it you should have full access to your exchange wallet.
If this is your first time making a crypto deposit, the screen here may look a bit scary. But don't worry, it's basically simpler than making a bank transfer. At the box on the right, you will see a string of random numbers saying 'BTC address', this is a unique public address of your BTC wallet at Binance and you can receive BTC by giving this address to the person to send you the funds. Since we are now transferring our previously bought BTC on UpHold to this wallet, click on 'Copy Address' or right-click on the full address and click copy to grab this address to your clipboard.
Now head back to UpHold, go to the Transact screen and click on BTC on the "From" field, choose the amount you wan to send and on the "To" field choose BTC under "Crypto Network", then click "Preview withdraw".
On the next screen, paste the wallet address from your clipboard, for security consideration you should always check if both addresses are matching. It is known that there are certain computer malware that would alter the content in your clipboard into another wallet address and you will be essentially sending funds to another person.
After reviewing, click 'Confirm' to proceed, you should receive a confirmation email instantly, click on the confirmation link in the email and your coins are on the way to Binance!
Now go back to Binance and head to your exchange wallets, don't worry if you haven't seen your deposit here. It is probably still being verified in the blockchain network and it should take a few minutes for your coins to arrive. Depending on the network traffic condition of the Bitcoin network, during busy times it may take even longer.
You should receive a confirmation notification from Binance once your BTC has arrived. And you are now finally ready to purchase LTO!
Step 5: Trade LTO
Go back to Binance, then go to 'Exchange'. Boom! What a view! The constantly flicking figures might be a bit scary, but relax, let's get our heads around this.
In the right column there is a search bar, now make sure "BTC" is selected as we are trading BTC to altcoin pair. Click on it and type in "LTO", you should see LTO/BTC, select that pair and you should see a price chart of LTO/BTC in the middle of the page.
Below there is a box with a green button that says "Buy LTO", inside of the box, choose the "Market" tab here as that is the most straight-forward type of buying orders. You can either type in your amount or choose what portion of your deposit you would like to spend on buying, by clicking on the percentage buttons. When you have confirmed everything, click "Buy LTO". Voila! You have finally bought LTO!
But we are not done yet. We need to convert our BTC into LTO. As LTO is currently listed on PancakeSwap we will guide you through how to convert your BTC on the platform. Unlike other centralised exchanges the conversion steps will be a little different on PancakeSwap since it is a decentralised exchange (DEX) which does not require you to register an account nor going through any KYC process, however, trading on a DEX requires you to manage your own private key to your altcoin wallet and it is suggested that you take extra care of your wallet private key, because if you lost your keys, it means that you will lost access to your coins forever and no customer support will help you retrieve your assets back. Although if managed properly it is in fact more secure to store your assets in your own private wallet than on exchange wallets. If you are still uncomfortable with using a DEX just yet, check if LTO is available on any other traditional centralised exchanges on the tab above. Otherwise let’s follow these steps carefully.
Convert your BTC into BNB on Binance
PancakeSwap is a DEX that is similar to Uniswap/Sushiswap, but instead it runs on Binance Smart Chain (BSC), where you will be able to trade all BEP-20 tokens (as oppose to ERC-20 tokens in the Ethereum blockchain), unlike Ethereum, it greatly reduces the trading(gas) fees while trading on the platform and is gaining popularity recently. PancakeSwap is built on an automated market maker (AMM) system which relies on user-funded liquidity pools and that is why it can work perfectly without a traditional order book from centralised exchanges.
In short, as LTO is a BEP-20 token running on Binance Smart Chain, the quickest way to buy it is to transfer your BTC to Binance (or the exchanges listed on the table below for US traders), convert it into BNB, then send it to your own wallet via Binance Smart Chain and swap your BNB for LTO on PancakeSwap.
US traders should consider signing up on the exchanges below.
Once you have registered on Binance or the exchanges suggested above, head over to the wallet page and choose the BTC and click deposit. Copy the BTC address and head back to UpHold, withdraw your BTC to this address and wait for it to arrive, this should take around 15-30 minutes depending on usage of the BTC network. Once arrived, trade your BTC to Binance Coin (BNB).
Transfer BNB to your own wallet
Here comes the trickiest part of the process, now you need to create your own wallet to hold both BNB and LTO, there are several options to create your own wallet, the best option is to use a hardware wallet, such as Ledger Nano S or Ledger Nano X. They are secure hardware that provide various layers of security to protect your assets, you only have to store the seed phrases in a safe place and never put it online (i.e. do NOT upload the seed phrases to any cloud services/storage/email, and also do not take photo of it). If you are planning to stay in the crypto scene for a while, it is highly recommended that you get a hardware wallet.
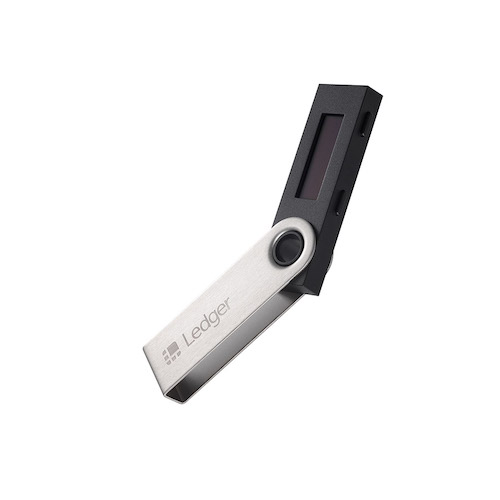
Ledger Nano S
- Easy to set up and friendly interface
- Can be used on desktops and laptops
- Lightweight and Portable
- Support most blockchains and wide range of (ERC-20/BEP-20) tokens
- Multiple languages available
- Built by a well-established company found in 2014 with great chip security
- Affordable price
Ledger Nano X
- More powerful secure element chip (ST33) than Ledger Nano S
- Can be used on desktop or laptop, or even smartphone and tablet through Bluetooth integration
- Lightweight and Portable with built-in rechargeable battery
- Larger screen
- More storage space than Ledger Nano S
- Support most blockchains and wide range of (ERC-20/BEP-20) tokens
- Multiple languages available
- Built by a well-established company found in 2014 with great chip security
- Affordable price
Alternatively you can create your own wallet, here we will use MetaMask as an example to show you how to set up your wallet.
Add MetaMask extension to Chrome
We recommend using Google Chrome or Brave Browser here. Go to Chrome Web Store and search for MetaMask, make sure the extension is offered by https://metamask.io for safety and then click Add to Chrome.
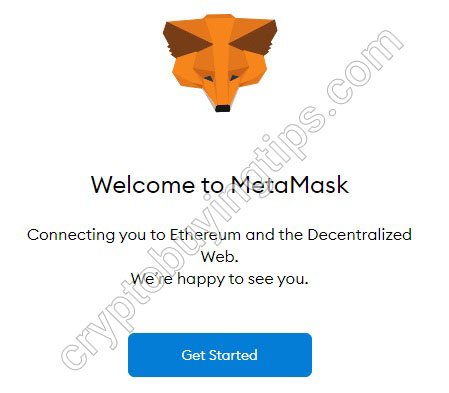
Proceed with "Get Started" and then click on "create a wallet" in the next screen, read all the instructions on the next screen and then click "Agree"
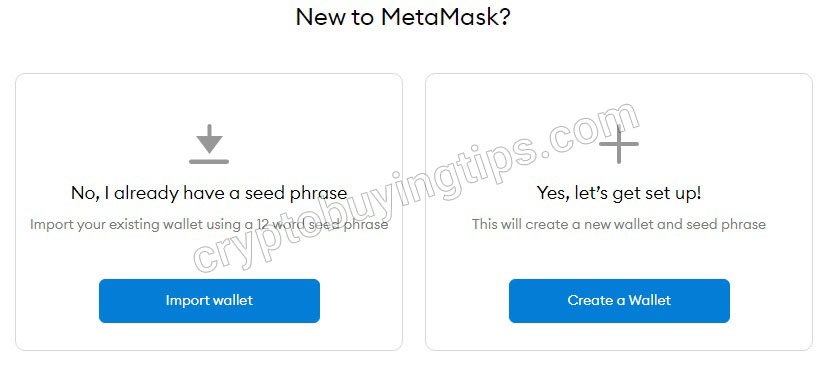
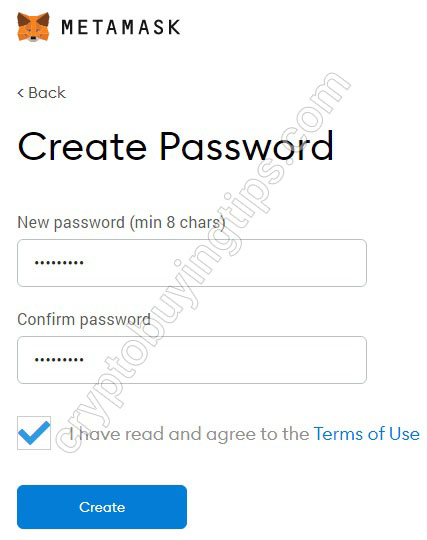
Next choose a secure password to secure your MetaMask wallet, this password is not your private key or seed phrases, you only need this password to access the Chrome Extension.
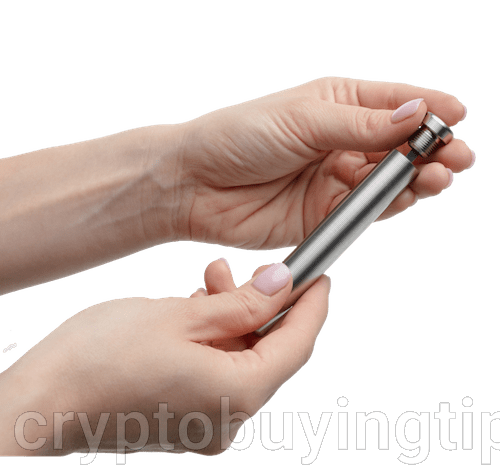
Here comes the backup phrase generation step, on the screen you will see a list of random words appearing after you click "reveal secret words", write these words down on a piece of paper and do not ever save them online, anywhere. For extra security you may even consider getting a Cryptosteel Capsule from Ledger to store your phrases securely and physically.
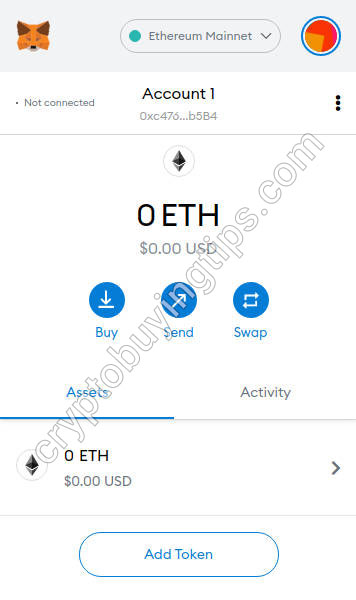
Once you have saved your seed phrases securely, confirm on the next screen by verifying them. And you’re done! Read the tips once more to ensure you’re fully aware of the security issues and click all done, now your wallet is ready. Now click on the MetaMask icon on the extension bar on the browser and unlock your wallet with your password. You should see your initial balance afterwards.
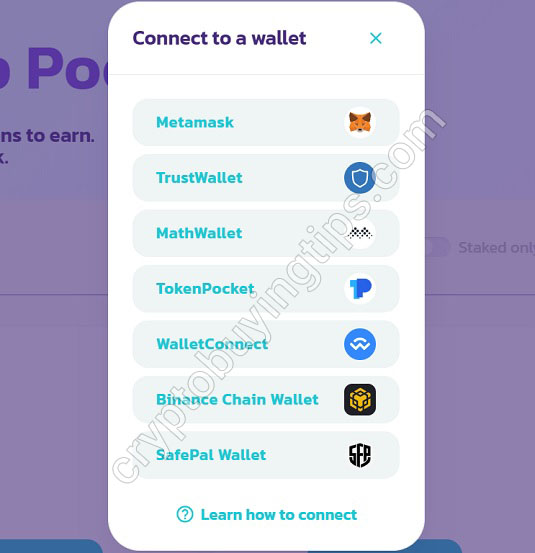
Now you are ready to deposit your BNB to your wallet, head over to PancakeSwap, click "Connect" at the top and choose MetaMask.
If this is your first time to connect with MetaMask you should be asked immediately if you would like to add the Binance Smart Chain network to your MetaMask, please do proceed with this step as it is very important that you make sure you are sending your BNB via the right network. After adding the network, switch to the network on MetaMask and you should be able to see your BNB balance on the Binance Smart Chain. Now copy the address to clipboard by clicking on the account name.
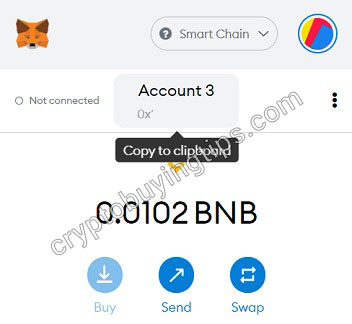
Now head back to Binance or whichever exchange you bought BNB. Go to the BNB wallet and select Withdraw, on the recipient address, paste your own wallet address and make sure it is the correct address, then on transfer network, make sure you have selected Binance Smart Chain (BSC) or BEP20 (BSC)
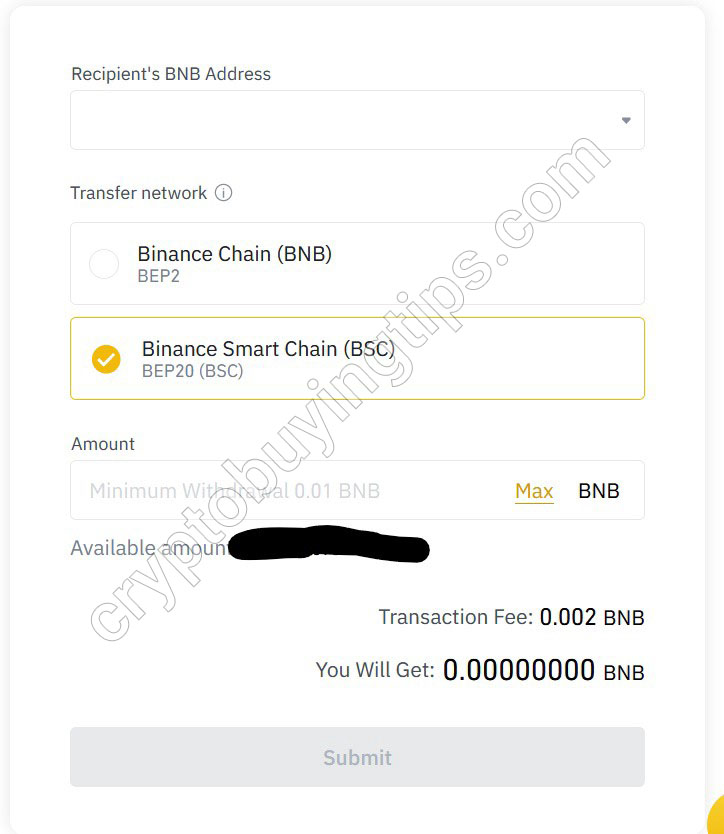
Click submit and follow the verification steps afterwards. After successfully withdrawing your BNB it should arrive very shortly to your own wallet. Now you’re ready to buy LTO finally!
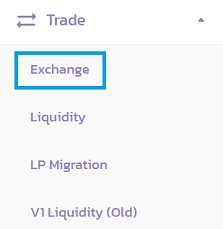
Head back to PancakeSwap, select Trade > Exchange on the left sidebar
You should see a relatively simpler interface here with basically just two fields, from and to, and a big button saying either "Connect Wallet" or “Swap”.
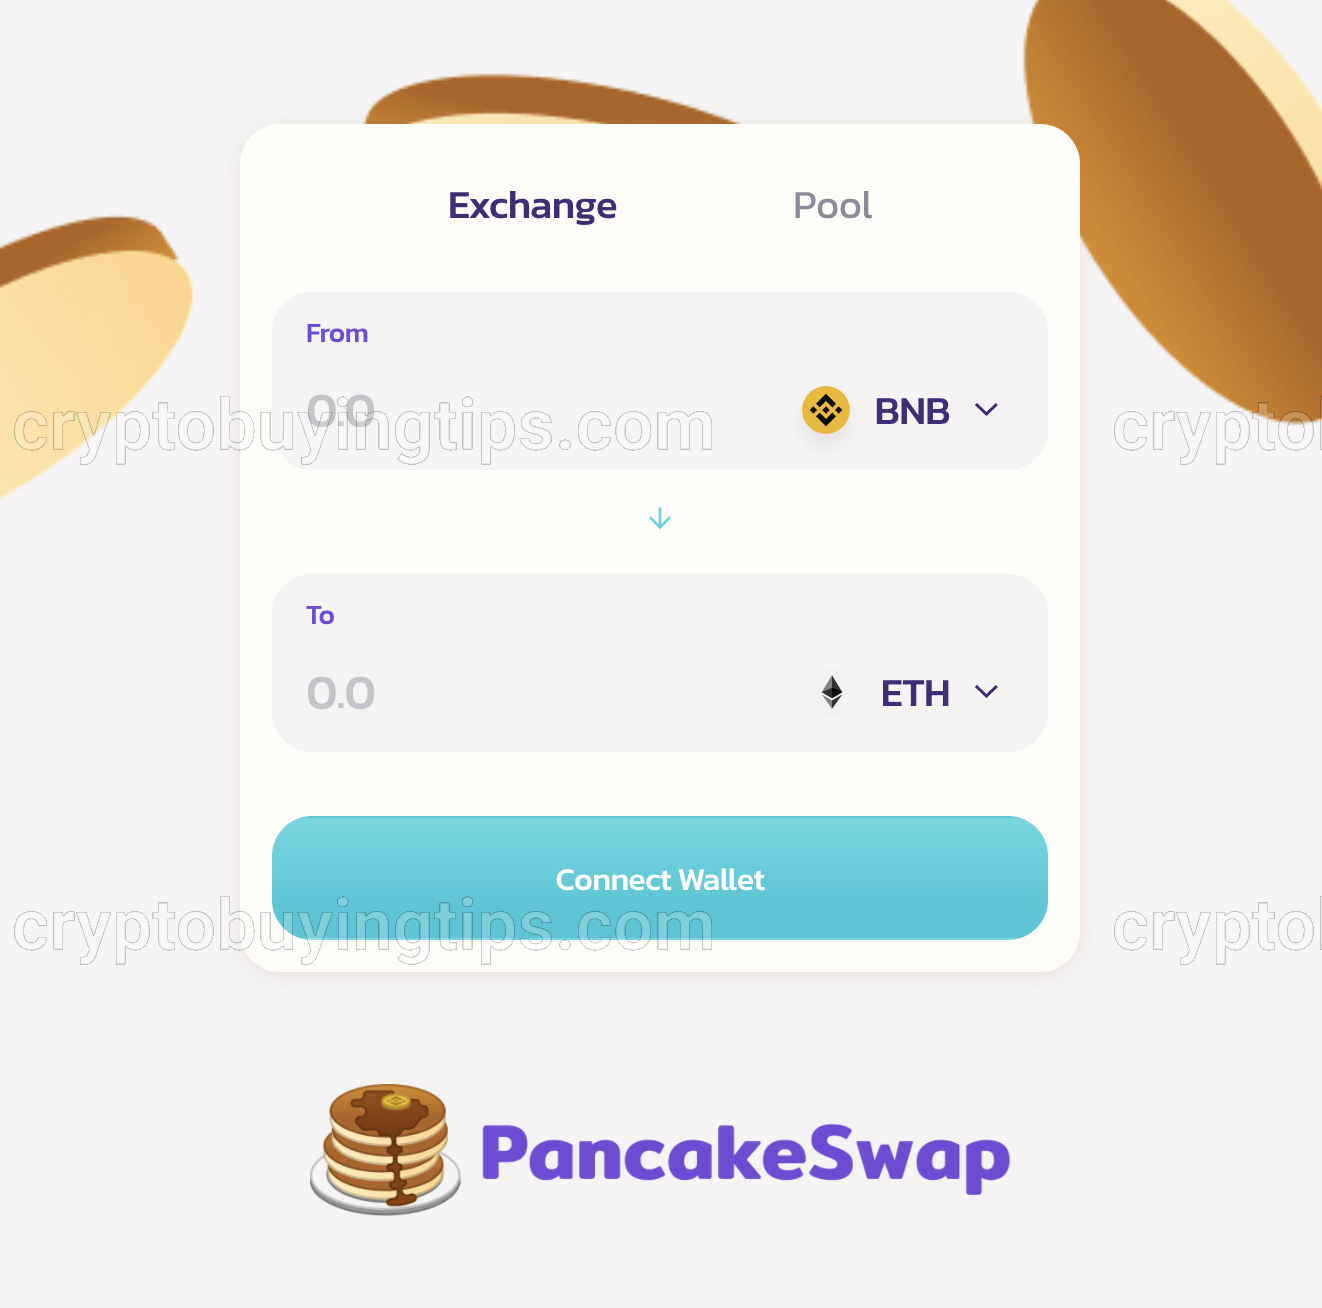
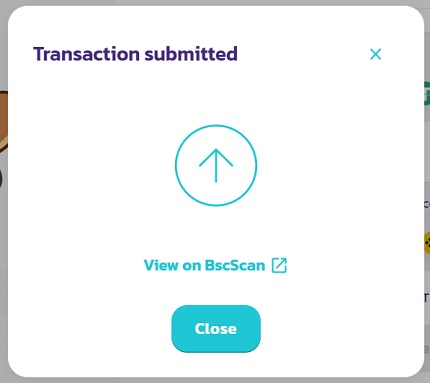
Click on Connect Wallet if you haven’t done so already. Otherwise you should be able to see your BNB balance here at the from field, enter the amount you would like to exchange for LTO and then on the to field, choose LTO from the dropdown, the corresponding amount of LTO should show up immediately. Verify and then proceed with "Swap". In the next screen, confirm the transaction once more by clicking Confirm Swap. Now MetaMask should pop up and ask you if you want to allow PancakeSwap to spend your BNB, click Confirm. Wait for the confirmation screen until it shows "Transaction Submitted", congratulations! You have finally bought LTO!! After a short while you should be able to see your LTO balance on your MetaMask Wallet.
But we are not done yet. We need to convert our BTC into LTO. As LTO is currently listed on PancakeSwap we will guide you through how to convert your BTC on the platform. Unlike other centralised exchanges the conversion steps will be a little different on PancakeSwap since it is a decentralised exchange (DEX) which does not require you to register an account nor going through any KYC process, however, trading on a DEX requires you to manage your own private key to your altcoin wallet and it is suggested that you take extra care of your wallet private key, because if you lost your keys, it means that you will lost access to your coins forever and no customer support will help you retrieve your assets back. Although if managed properly it is in fact more secure to store your assets in your own private wallet than on exchange wallets. If you are still uncomfortable with using a DEX just yet, check if LTO is available on any other traditional centralised exchanges on the tab above. Otherwise let’s follow these steps carefully.
Convert your BTC into BNB on Binance
PancakeSwap is a DEX that is similar to Uniswap/Sushiswap, but instead it runs on Binance Smart Chain (BSC), where you will be able to trade all BEP-20 tokens (as oppose to ERC-20 tokens in the Ethereum blockchain), unlike Ethereum, it greatly reduces the trading(gas) fees while trading on the platform and is gaining popularity recently. PancakeSwap is built on an automated market maker (AMM) system which relies on user-funded liquidity pools and that is why it can work perfectly without a traditional order book from centralised exchanges.
In short, as LTO is a BEP-20 token running on Binance Smart Chain, the quickest way to buy it is to transfer your BTC to Binance (or the exchanges listed on the table below for US traders), convert it into BNB, then send it to your own wallet via Binance Smart Chain and swap your BNB for LTO on PancakeSwap.
US traders should consider signing up on the exchanges below.
Once you have registered on Binance or the exchanges suggested above, head over to the wallet page and choose the BTC and click deposit. Copy the BTC address and head back to UpHold, withdraw your BTC to this address and wait for it to arrive, this should take around 15-30 minutes depending on usage of the BTC network. Once arrived, trade your BTC to Binance Coin (BNB).
Transfer BNB to your own wallet
Here comes the trickiest part of the process, now you need to create your own wallet to hold both BNB and LTO, there are several options to create your own wallet, the best option is to use a hardware wallet, such as Ledger Nano S or Ledger Nano X. They are secure hardware that provide various layers of security to protect your assets, you only have to store the seed phrases in a safe place and never put it online (i.e. do NOT upload the seed phrases to any cloud services/storage/email, and also do not take photo of it). If you are planning to stay in the crypto scene for a while, it is highly recommended that you get a hardware wallet.

Ledger Nano S
- Easy to set up and friendly interface
- Can be used on desktops and laptops
- Lightweight and Portable
- Support most blockchains and wide range of (ERC-20/BEP-20) tokens
- Multiple languages available
- Built by a well-established company found in 2014 with great chip security
- Affordable price

Ledger Nano X
- More powerful secure element chip (ST33) than Ledger Nano S
- Can be used on desktop or laptop, or even smartphone and tablet through Bluetooth integration
- Lightweight and Portable with built-in rechargeable battery
- Larger screen
- More storage space than Ledger Nano S
- Support most blockchains and wide range of (ERC-20/BEP-20) tokens
- Multiple languages available
- Built by a well-established company found in 2014 with great chip security
- Affordable price
Alternatively you can create your own wallet, here we will use MetaMask as an example to show you how to set up your wallet.
Add MetaMask extension to Chrome
We recommend using Google Chrome or Brave Browser here. Go to Chrome Web Store and search for MetaMask, make sure the extension is offered by https://metamask.io for safety and then click Add to Chrome.

Proceed with "Get Started" and then click on "create a wallet" in the next screen, read all the instructions on the next screen and then click "Agree"

Next choose a secure password to secure your MetaMask wallet, this password is not your private key or seed phrases, you only need this password to access the Chrome Extension.

Here comes the backup phrase generation step, on the screen you will see a list of random words appearing after you click "reveal secret words", write these words down on a piece of paper and do not ever save them online, anywhere. For extra security you may even consider getting a Cryptosteel Capsule from Ledger to store your phrases securely and physically.

Once you have saved your seed phrases securely, confirm on the next screen by verifying them. And you’re done! Read the tips once more to ensure you’re fully aware of the security issues and click all done, now your wallet is ready. Now click on the MetaMask icon on the extension bar on the browser and unlock your wallet with your password. You should see your initial balance afterwards.

Now you are ready to deposit your BNB to your wallet, head over to PancakeSwap, click "Connect" at the top and choose MetaMask.

If this is your first time to connect with MetaMask you should be asked immediately if you would like to add the Binance Smart Chain network to your MetaMask, please do proceed with this step as it is very important that you make sure you are sending your BNB via the right network. After adding the network, switch to the network on MetaMask and you should be able to see your BNB balance on the Binance Smart Chain. Now copy the address to clipboard by clicking on the account name.

Now head back to Binance or whichever exchange you bought BNB. Go to the BNB wallet and select Withdraw, on the recipient address, paste your own wallet address and make sure it is the correct address, then on transfer network, make sure you have selected Binance Smart Chain (BSC) or BEP20 (BSC)

Click submit and follow the verification steps afterwards. After successfully withdrawing your BNB it should arrive very shortly to your own wallet. Now you’re ready to buy LTO finally!
Head back to PancakeSwap, select Trade > Exchange on the left sidebar

You should see a relatively simpler interface here with basically just two fields, from and to, and a big button saying either "Connect Wallet" or “Swap”.

Click on Connect Wallet if you haven’t done so already. Otherwise you should be able to see your BNB balance here at the from field, enter the amount you would like to exchange for LTO and then on the to field, choose LTO from the dropdown, the corresponding amount of LTO should show up immediately. Verify and then proceed with "Swap". In the next screen, confirm the transaction once more by clicking Confirm Swap. Now MetaMask should pop up and ask you if you want to allow PancakeSwap to spend your BNB, click Confirm. Wait for the confirmation screen until it shows "Transaction Submitted", congratulations! You have finally bought LTO!! After a short while you should be able to see your LTO balance on your MetaMask Wallet.

Apart from the exchange(s) above, there are a few popular crypto exchanges where they have decent daily trading volumes and a huge user base. This will ensure you will be able to sell your coins at any time and the fees will usually be lower. It is suggested that you also register on these exchanges since once LTO gets listed there it will attract a large amount of trading volumes from the users there, that means you will be having some great trading opportunities!
Huobi
Huobi is originally a Chinese crypto exchange. From what it seems, it has now registered in the Seychelles. This exchange is one of the six exchanges from the Seychelles. The liquidity at Huobi is impressive. The liquidity, together with its customer support that is open 24 hours a day 365 days a year and good security. If you sign up to Huobi using our link below, you will receive a series of welcome bonuses, as follows: 1. USDT 10 when you have registered and verified your profile, 2. USDT 50 when you have deposited/bought 100 USDT worth of tokens via Huobi OTC, and 3. A chance of up to USDT 60 when you have completed a minimum of 100 USDT worth of crypto-to-crypto trading. Huobi does not allow US-investors on its exchange.
OKEx
OKEx is a crypto exchange that was previously based in Hong Kong. According to info provided directly from the exchange to us, it is now based in Malta. Malta is together with Estonia and Gibraltar one of the few countries in Europe that has clear license requirements for crypto exchanges. When Malta issued license requirements for crypto exchanges, a lot of exchanges from other parts of the world actually relocated to Malta. US-investors may not trade on this exchange. So if you are a US-investor and want to trade at OKEx, you’ll have to reconsider your choice of trading venue and choose one of the other top crypto exchanges.
Last Step: Store LTO securely in hardware wallets

Ledger Nano S
- Easy to set up and friendly interface
- Can be used on desktops and laptops
- Lightweight and Portable
- Support most blockchains and wide range of (ERC-20/BEP-20) tokens
- Multiple languages available
- Built by a well-established company found in 2014 with great chip security
- Affordable price

Ledger Nano X
- More powerful secure element chip (ST33) than Ledger Nano S
- Can be used on desktop or laptop, or even smartphone and tablet through Bluetooth integration
- Lightweight and Portable with built-in rechargeable battery
- Larger screen
- More storage space than Ledger Nano S
- Support most blockchains and wide range of (ERC-20/BEP-20) tokens
- Multiple languages available
- Built by a well-established company found in 2014 with great chip security
- Affordable price
If you are planning to keep("hodl" as some may say, basically misspelt "hold" which get popularised over time) your LTO for a considerable long time, you may want to explore ways of keeping it safe, although Binance is one of the safest cryptocurrency exchange there had been hacking incidents and funds were lost. Because of the very nature of the wallets in exchanges, they will be always online("Hot Wallets" as we call them), therefore exposing certain aspects of vulnerabilities. The safest way of storing your coins to date is always putting them into a type of "Cold Wallets", where the wallet will only have access to the blockchain(or simply "go online") when you send out funds, reducing the chances of hacking incidents. A paper wallet is a type of free cold wallet, it's basically an offline-generated pair of public and private address and you will have it written somewhere, and keep it safe. However, it is not durable and is susceptible to various hazards.
Hardware wallet here is definitely a better option of cold wallets. They are usually USB-enabled devices that store the key information of your wallet in a more durable way. They are built with military-level security and their firmware are constantly maintained by their manufacturers and thus extremely safe. Ledger Nano S and Ledger Nano X and are the most popular options in this category, these wallets cost around $50 to $100 depending on the features they are offering. If you are holding your assets these wallets are a good investment in our opinion.
Other useful tools for trading LTO
Encrypted Secure Connection
NordVPN
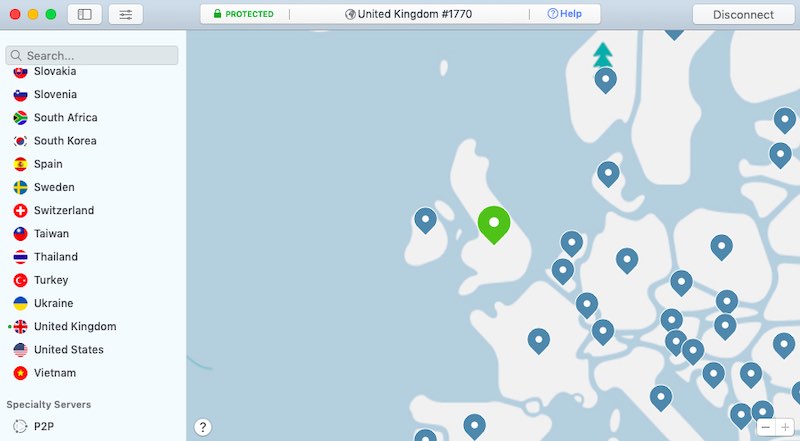
Because of the very nature of cryptocurrency – decentralised, it means that users are 100% responsible for handling their assets securely. While using hardware wallet allows you to store your cryptos in a safe place, using an encrypted VPN connection while you trade makes it harder for hackers to intercept or eavesdrop your sensitive information. Especially when you are trading on the go or in a public Wifi connection. NordVPN is one of the best paid (note: never use any free VPN services as they may sniff your data in return of free service) VPN services out there and it has been around for almost a decade. It offers military-grade encrypted connection and you can also opt-in to block malicious websites and ads with their CyberSec feature. You can choose to connect to 5000+ servers in 60+ countries base on your current location, which ensures you to always have a smooth and secure connection wherever you are. There is no bandwidth or data limits that means you can also use the service in your everyday routines such as streaming videos or downloading large files. Plus it is among the cheapest VPN services out there (only $3.49 per month).
Surfshark
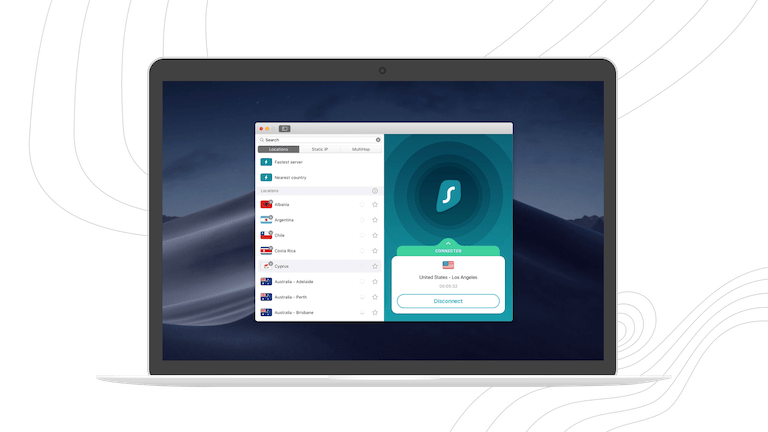
Surfshark is a much cheaper alternative if you are looking for a secure VPN connection. Although it’s a relatively new company, it has already 3200+ servers distributed in 65 countries. Apart from VPN it also has some other cool features including CleanWeb™, which actively blocks ads, trackers, malware and phishing attempts while you are surfing on your browser. Currently, Surfshark does not have any device limit so you can basically use it on as many devices as you want and even share the service with your friends and family. Use the signup link below to get an 81% discount(that’s a lot!!) at $2.49/month!
Atlas VPN
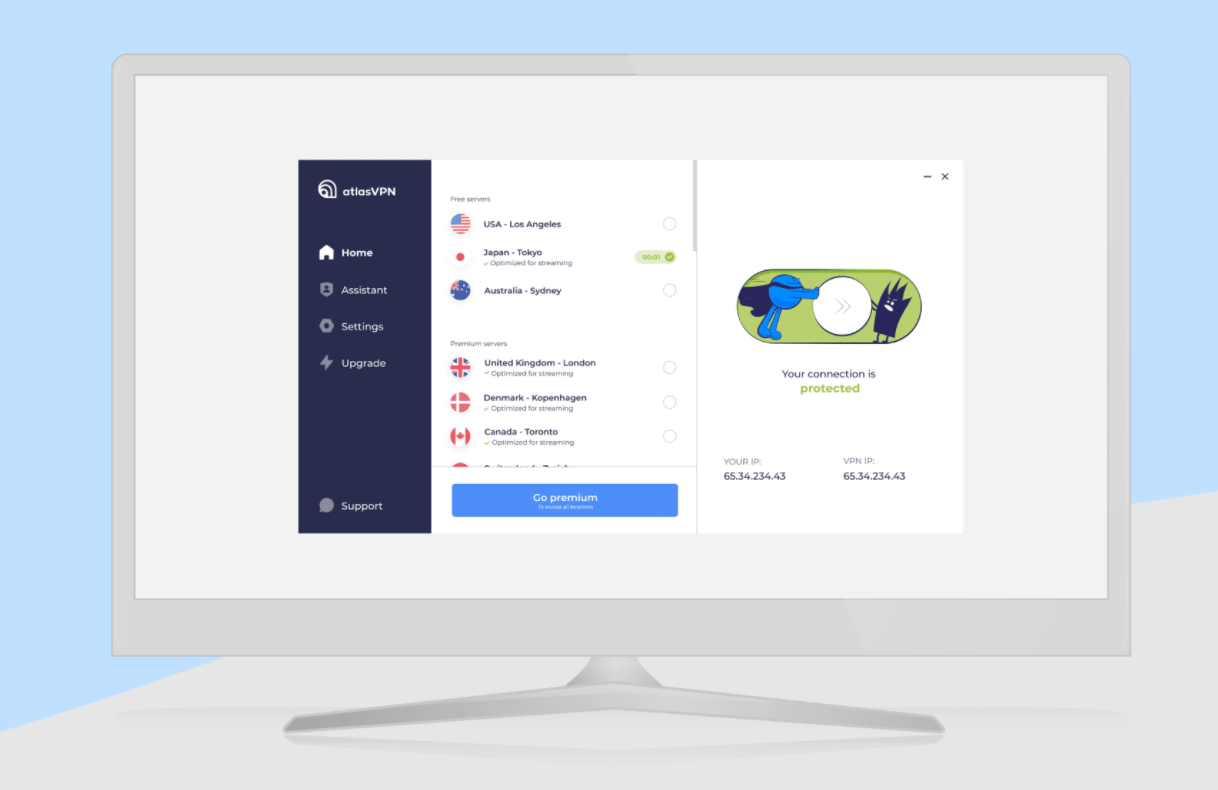
IT nomads created Atlas VPN after seeing a lack of top-notch service within the free VPNs field. Atlas VPN was designed for everyone to have free access to unrestricted content without any strings attached. Atlas VPN set out to be the first trustworthy free VPN armed with top-notch technology. Furthermore, even though Atlas VPN is the new kid on the block, their blog team’s reports have been covered by well-known outlets such as Forbes, Fox News, Washington Post, TechRadar and many others. Below are some of the feature highlights:
- Strong encryption
- Tracker blocker feature blocks dangerous websites, stops third-party cookies from tracking your browsing habits and prevents behavioural advertising.
- Data Breach Monitor finds out whether your personal data is safe.
- SafeSwap servers allow you to have many rotating IP addresses by connecting to a single server
- Best prices on the VPN market (only $1.39/month!!)
- No-log policy to keep your privacy safe
- Automatic Kill Switch to block your device or apps from accessing the internet if the connection fails
- Unlimited simultaneous connections.
- P2P support
Frequently Asked Questions
Can I buy LTO with cash?
There is no direct way to buy LTO with cash. However, you can use marketplaces such as LocalBitcoins to first purchase BTC, and finish the rest of the steps by transferring your BTC to respective AltCoin exchanges.
LocalBitcoins is a peer-to-peer Bitcoin exchange. It is a marketplace where users can buy and sell Bitcoins to and from each other. Users, called traders, create advertisements with the price and the payment method they want to offer. You can choose to buy from sellers from a certain nearby region on the platform. is after all a good place to go to buy Bitcoins when you can't find your desired payment methods anywhere else. But prices are usually higher on this platform and you have to do your due diligence to avoid getting scammed.
Are there any quick ways to buy LTO in Europe?
Yes, in fact, Europe is one of the easiest places to buy cryptos in general. There are even online banks which you can simply open an account and transfer money to exchanges such as Coinbase and Uphold.
Are there any alternative platforms to buy LTO or Bitcoin with credit cards?
Yes. is also a very easy to use platform for buying Bitcoin with credit cards. It is an instant cryptocurrency exchange that allows you to exchange crypto fast and buy it with a bank card. Its user interface is very easy to use and the buying steps are pretty self-explanatory.
Read more on LTO Network's fundamentals and current price here.
LTO Price Prediction and Price Movement
LTO is up 207.29 percent over the last three months, while its market capitalization is still considered relatively small, which implies that the price of LTO can be very volatile comparing to those with larger market cap during big market moves. However, with a stead growth over the past three months, LTO has the potential to grow further and may yield some very decent gains. Again traders should remain cautious at all time.
Please note that this analysis is purely base on LTO's historic price actions and is by no means financial advice. Traders should always do their own research and be extra careful while investing in cryptocurrencies.


