How and Where to Buy DIA (DIA) – Detailed Guide
- What is DIA?
- Step 1: Register on Fiat-to-Crypto Exchange
- Step 2: Buy BTC with fiat money
- Step 3: Transfer BTC to an Altcoin Exchange
- Step 4: Deposit BTC to exchange
- Step 5: Trade DIA
- Last Step: Store DIA securely in hardware wallets
- Other useful tools for trading DIA
- Frequently Asked Questions
- Latest News for DIA
- DIA Price Prediction and Price Movement
What is DIA?
What Is DIA (DIA)?
DIA (Decentralised Information Asset) is an open-source oracle platform that enables market actors to source, supply and share trustable data. DIA aims to be an ecosystem for open financial data in a financial smart contract ecosystem, to bring together data analysts, data providers and data users. In general, DIA provides a reliable and verifiable bridge between off-chain data from various sources and on-chain smart contracts that can be used to build a variety of financial DApps.
DIA is the governance token of the platform. It is currently based on ERC-20 Ethereum protocol.
The project was founded in 2018, while the token supply was made available to the public during the bonding curve sale from Aug. 3 through Aug. 17, 2020, where 10.2 million tokens were sold.
Who Are the Founders of DIA?
The DIA association was co-founded by a group of a dozen people, though Paul Claudius, Michael Weber and Samuel Brack are the leaders.
Claudius is the face of the project and its lead advocate, sometimes also mentioned as a CBO. He has a masters degree in international management from ESCP Europe and a bachelors in business and economics from Passau University. Apart from working on DIA, he is also a co-founder and CEO of BlockState AG and c ventures. Before crypto, he had worked as director for a nutrition company called nu3.
Michael Weber is DIA's Founder and Association President. He holds degrees in management from ESCP Business School and an economics and physics from University of Cologne, Germany.
He has worked in several banks and financial institutions before turning to crypto, where he founded such projects as Goodcoin, myLucy and BlockState.
Samuel Brack serves DIA in the role of CTO. Like both Claudius and Weber, he shares the same position at BlockState. He has a masters degree in computer science from Humboldt University of Berlin, where as of January 2020, he is still studying for his PhD.
What Makes DIA Unique?
DIA aims to become the Wikipedia of financial data. It specifically addresses the problem of dated/unverified/hard to access data in the world of finance and crypto, especially DeFi, while proposing to solve it viaa system of financial incentives for users to keep the flow of open-source, validated data streams to the oracles up and running. The current design of oracles, DIA argues, is non-transparent, difficult to scale and vulnerable to attack.
The DIA governance token will be used to fund data collection, data validation, voting on governance decisions and to incentivize the development of the platform. Users can stake DIA tokens to incentivi`e new data to appear on the platform, but access to historical data though DIA is free.
Related Pages:
Check out Chainlink, a decentralised oracle network for DeFi
Tellor is another Ethereum-based oracle for DeFi and DApps
What is a DAO?
New to oracles and DeFi? Learn more with our glossary.
Ready for more? Check out our blog for the latest crypto news and insights.
How Many DIA (DIA) Tokens Are There in Circulation?
The total DIA token supply is limited with 200 million coins minted. 10 million tokens were initially sold at a private sale, 19.5 million are with early investors and advisors, Outlier Ventures being the largest. 30 million coins were offered for a bonding curve sale in August 2020, out of which 10.2 million were sold to the public, and the remaining 19.8 million burned. Another 24 million tokens are allocated to founders and team with a 29 month vesting period, and 25 million locked for the future use for the development of the DIA ecosystem. Finally, 91.5 million DIA tokens are in the company's reserve to be unlocked in equal parts over 10 years every December. Out of the first unlocked part, half of the tokens were burned in an instant, after the community vote makes the decision.
It is planned that smart contracts using DIA oracles will be receiving DIA Governance Tokens on a daily basis through what they call “proof-of-use” and “proof-of-truth” mechanisms.
How Is the DIA Network Secured?
DIA is a standard ERC-20 token, meaning it requires Ethereum to function, inheriting all its strengths and weaknesses. The Ethereum network is one of the largest and thus strongest because of its decentralization, as all transactions are protected by the Ethash proof-of-work function. ERC-20 merely defines a set of rules for tokens to operate on. Downsides of Ethereum may be noticeable: for example, congestion can hike the price of gas needed to perform transactions, leading to delays and abnormally high transaction fees, which impact all participants.
Where Can You Buy DIA (DIA)?
DIA is a freely-tradable token. Pairs available for trading include BTC, USDT and ETH The top exchanges for trading in DIA are currently Binance, OKEx, HBTC, Bidesk, and BiKi. You can find others listed on our crypto exchanges page.
New to crypto and want to know how to buy Bitcoin (BTC) or any other token? Find out the details here.
DIA was first tradable on 4th Aug, 2020. It has a total supply of 200,000,000. As of right now DIA has a market capitalization of USD $unknown. The current price of DIA is $4.17 and is ranked 179 on Coinmarketcap and has recently surged 29.63 percent at the time of writing.
DIA has been listed on a number of crypto exchanges, unlike other main cryptocurrencies, it cannot be directly purchased with fiats money. However, You can still easily buy this coin by first buying Bitcoin from any fiat-to-crypto exchanges and then transfer to the exchange that offers to trade this coin, in this guide article we will walk you through in detail the steps to buy DIA.
Step 1: Register on Fiat-to-Crypto Exchange
You will have to first buy one of the major cryptocurrencies, in this case, Bitcoin (BTC). In this article we will walk you through in details two of the most commonly-used fiat-to-crypto exchanges, Uphold.com and Coinbase. Both exchanges have their own fee policies and other features that we will go through in detail. It is recommended that you try both of them and figure out the one that suits you best.
Select Fiat-to-Crypto Exchange for details:
- UpHold
Being one of the most popular and convenient fiat-to-crypto exchanges, UpHold has the following advantages:
- Easy to buy and trade among multiple assets, more than 50 and still adding
- Currently more than 7M users worldwide
- You can apply for UpHold Debit card where you can spend the crypto assets on your account like a normal debit card! (US only but will be in the UK later)
- Easy to use mobile app where you can withdraw fund to a bank or any other altcoin exchanges easily
- No hidden fees and any other account fees
- There are limited buy/sell orders for more advanced users
- You can easily set up recurring deposits for Dollar Cost Averaging (DCA) if you intend to hold cryptos long term
- USDT, which is one of the most popular USD-backed stablecoins (basically a crypto that is backed by real fiat money so they are less volatile and can be treated almost as the fiat money it's pegged with) is available, this is more convenient if the altcoin you intend to buy has only USDT trading pairs on the altcoin exchange so you don't have to go through another currency conversion while you buy the altcoin.
Type your email and click 'Next'. Make sure you provide your real name as UpHold will need it for account and identity verification. Choose a strong password so that your account isn't vulnerable to hackers.
You will receive a confirmation email. Open it and click on the link within. You will then be required to provide a valid mobile number to set up two-factor authentication (2FA), it is an extra layer to the security of your account and it is highly recommended that you keep this feature turned on.
Follow the next step to finish your identity verification. These steps are a bit daunting especially when you are waiting to buy an asset but just like any other financial institutions, UpHold is regulated in most countries such as the US, the UK and the EU. You can take this as a trade-off to using a trusted platform to make your first crypto purchase. Good news is that the whole so-called Know-Your-Customers (KYC) process is now fully automated and it shouldn't take more than 15 minutes to finish.
Step 2: Buy BTC with fiat money
Once you finished the KYC process. You will be asked to add a payment method. Here you can either choose to provide a credit/debit card or use a bank transfer. You may be charged higher fees depending on your credit card company and the volatile prices when using cards but you will also make an instant purchase. While a bank transfer will be cheaper but slower, depending on the country of your residence, some countries will offer instant cash deposit with low fees.
Now you are all set, on the 'Transact' screen under the 'From' field, select your fiat currency, and then on the 'To' field choose Bitcoin, click preview to review your transaction and the click confirm if everything looks good... and congrats! You've just made your first crypto purchase.
Step 3: Transfer BTC to an Altcoin Exchange
Select altcoin exchanges:
- Gate.io

- BitMart

- OKEx

- KuCoin

- Binance

- HotBit

- Poloniex

- BitMax

But we are not done yet, since DIA is an altcoin we need to transfer our BTC to an exchange that DIA can be traded, here we will use Gate.io as our exchange. Gate.io is a popular exchange to trade altcoins and it has a large number of tradable altcoins pairs. Use the link below to register your new account.
Gate.io is an American cryptocurrency exchange that launched 2017. As the exchange is American, US-investors can of course trade here and we recommend US traders to sign up on this exchange. The exchange is available both in English and Chinese (the latter being very helpful for Chinese investors). Gate.io’s main selling factor is their wide selection of trading pairs. You can find most of the new altcoins here. Gate.io also demonstrates an impressive trading volume. It is almost every day one of the top 20 exchanges with the highest trading volume. The trading volume amounts to approx. USD 100 million on a daily basis. The top 10 trading pairs on Gate.io in terms of trading volume usually have USDT (Tether) as one part of the pair. So, to summarize the foregoing, Gate.io’s vast number of trading pairs and its extraordinary liquidity are both very impressive aspects of this exchange.
After going through a similar process as we've done before with UpHold, you will be advised to set up 2FA authentication as well, finish it as it adds extra security to your account.
Step 4: Deposit BTC to exchange
Depends on the policies of the exchange you might be required to go through another KYC process, this should usually take you from 30 minutes to possibly a few days maximum. Though the process should be straight-forward and easy to follow. Once you're done with it you should have full access to your exchange wallet.
If this is your first time making a crypto deposit, the screen here may look a bit scary. But don't worry, it's basically simpler than making a bank transfer. At the box on the right, you will see a string of random numbers saying 'BTC address', this is a unique public address of your BTC wallet at Gate.io and you can receive BTC by giving this address to the person to send you the funds. Since we are now transferring our previously bought BTC on UpHold to this wallet, click on 'Copy Address' or right-click on the full address and click copy to grab this address to your clipboard.
Now head back to UpHold, go to the Transact screen and click on BTC on the "From" field, choose the amount you wan to send and on the "To" field choose BTC under "Crypto Network", then click "Preview withdraw".
On the next screen, paste the wallet address from your clipboard, for security consideration you should always check if both addresses are matching. It is known that there are certain computer malware that would alter the content in your clipboard into another wallet address and you will be essentially sending funds to another person.
After reviewing, click 'Confirm' to proceed, you should receive a confirmation email instantly, click on the confirmation link in the email and your coins are on the way to Gate.io!
Now go back to Gate.io and head to your exchange wallets, don't worry if you haven't seen your deposit here. It is probably still being verified in the blockchain network and it should take a few minutes for your coins to arrive. Depending on the network traffic condition of the Bitcoin network, during busy times it may take even longer.
You should receive a confirmation notification from Gate.io once your BTC has arrived. And you are now finally ready to purchase DIA!
Step 5: Trade DIA
Go back to Gate.io, then go to 'Exchange'. Boom! What a view! The constantly flicking figures might be a bit scary, but relax, let's get our heads around this.
In the right column there is a search bar, now make sure "BTC" is selected as we are trading BTC to altcoin pair. Click on it and type in "DIA", you should see DIA/BTC, select that pair and you should see a price chart of DIA/BTC in the middle of the page.
Below there is a box with a green button that says "Buy DIA", inside of the box, choose the "Market" tab here as that is the most straight-forward type of buying orders. You can either type in your amount or choose what portion of your deposit you would like to spend on buying, by clicking on the percentage buttons. When you have confirmed everything, click "Buy DIA". Voila! You have finally bought DIA!
But we are not done yet, since DIA is an altcoin we need to transfer our BTC to an exchange that DIA can be traded, here we will use BitMart as our exchange. BitMart is a popular exchange to trade altcoins and it has a large number of tradable altcoins pairs. Use the link below to register your new account.
BitMart is a crypto exchange from the Cayman Islands. It became available to the public in March 2018. BitMart has a truly impressive liquidity. At the time of the last update of this review (20 March 2020, right in the middle of the crisis with COVID-19), BitMart’s 24 hour trading volume was USD 1.8 billion. This amount placed BitMart on place no. 24 on Coinmarketcap’s the list of exchanges with the highest 24 hour trading volumes. Needless to say, if you start trading here, you will not have to worry about the order book being thin. Many exchanges does not allow investors from USA as customers. As far as we can tell, BitMart is not one of those exchanges. Any US-investors interested in trading here should in any event form their own opinion on any issues arising from their citizenship or residency.
After going through a similar process as we've done before with UpHold, you will be advised to set up 2FA authentication as well, finish it as it adds extra security to your account.
Step 4: Deposit BTC to exchange
Depends on the policies of the exchange you might be required to go through another KYC process, this should usually take you from 30 minutes to possibly a few days maximum. Though the process should be straight-forward and easy to follow. Once you're done with it you should have full access to your exchange wallet.
If this is your first time making a crypto deposit, the screen here may look a bit scary. But don't worry, it's basically simpler than making a bank transfer. At the box on the right, you will see a string of random numbers saying 'BTC address', this is a unique public address of your BTC wallet at BitMart and you can receive BTC by giving this address to the person to send you the funds. Since we are now transferring our previously bought BTC on UpHold to this wallet, click on 'Copy Address' or right-click on the full address and click copy to grab this address to your clipboard.
Now head back to UpHold, go to the Transact screen and click on BTC on the "From" field, choose the amount you wan to send and on the "To" field choose BTC under "Crypto Network", then click "Preview withdraw".
On the next screen, paste the wallet address from your clipboard, for security consideration you should always check if both addresses are matching. It is known that there are certain computer malware that would alter the content in your clipboard into another wallet address and you will be essentially sending funds to another person.
After reviewing, click 'Confirm' to proceed, you should receive a confirmation email instantly, click on the confirmation link in the email and your coins are on the way to BitMart!
Now go back to BitMart and head to your exchange wallets, don't worry if you haven't seen your deposit here. It is probably still being verified in the blockchain network and it should take a few minutes for your coins to arrive. Depending on the network traffic condition of the Bitcoin network, during busy times it may take even longer.
You should receive a confirmation notification from BitMart once your BTC has arrived. And you are now finally ready to purchase DIA!
Step 5: Trade DIA
Go back to BitMart, then go to 'Exchange'. Boom! What a view! The constantly flicking figures might be a bit scary, but relax, let's get our heads around this.
In the right column there is a search bar, now make sure "BTC" is selected as we are trading BTC to altcoin pair. Click on it and type in "DIA", you should see DIA/BTC, select that pair and you should see a price chart of DIA/BTC in the middle of the page.
Below there is a box with a green button that says "Buy DIA", inside of the box, choose the "Market" tab here as that is the most straight-forward type of buying orders. You can either type in your amount or choose what portion of your deposit you would like to spend on buying, by clicking on the percentage buttons. When you have confirmed everything, click "Buy DIA". Voila! You have finally bought DIA!
But we are not done yet, since DIA is an altcoin we need to transfer our BTC to an exchange that DIA can be traded, here we will use OKEx as our exchange. OKEx is a popular exchange to trade altcoins and it has a large number of tradable altcoins pairs. Use the link below to register your new account.
OKEx is a crypto exchange that was previously based in Hong Kong. According to info provided directly from the exchange to us, it is now based in Malta. Malta is together with Estonia and Gibraltar one of the few countries in Europe that has clear license requirements for crypto exchanges. When Malta issued license requirements for crypto exchanges, a lot of exchanges from other parts of the world actually relocated to Malta. US-investors may not trade on this exchange. So if you are a US-investor and want to trade at OKEx, you’ll have to reconsider your choice of trading venue and choose one of the other top crypto exchanges.
After going through a similar process as we've done before with UpHold, you will be advised to set up 2FA authentication as well, finish it as it adds extra security to your account.
Step 4: Deposit BTC to exchange
Depends on the policies of the exchange you might be required to go through another KYC process, this should usually take you from 30 minutes to possibly a few days maximum. Though the process should be straight-forward and easy to follow. Once you're done with it you should have full access to your exchange wallet.
If this is your first time making a crypto deposit, the screen here may look a bit scary. But don't worry, it's basically simpler than making a bank transfer. At the box on the right, you will see a string of random numbers saying 'BTC address', this is a unique public address of your BTC wallet at OKEx and you can receive BTC by giving this address to the person to send you the funds. Since we are now transferring our previously bought BTC on UpHold to this wallet, click on 'Copy Address' or right-click on the full address and click copy to grab this address to your clipboard.
Now head back to UpHold, go to the Transact screen and click on BTC on the "From" field, choose the amount you wan to send and on the "To" field choose BTC under "Crypto Network", then click "Preview withdraw".
On the next screen, paste the wallet address from your clipboard, for security consideration you should always check if both addresses are matching. It is known that there are certain computer malware that would alter the content in your clipboard into another wallet address and you will be essentially sending funds to another person.
After reviewing, click 'Confirm' to proceed, you should receive a confirmation email instantly, click on the confirmation link in the email and your coins are on the way to OKEx!
Now go back to OKEx and head to your exchange wallets, don't worry if you haven't seen your deposit here. It is probably still being verified in the blockchain network and it should take a few minutes for your coins to arrive. Depending on the network traffic condition of the Bitcoin network, during busy times it may take even longer.
You should receive a confirmation notification from OKEx once your BTC has arrived. And you are now finally ready to purchase DIA!
Step 5: Trade DIA
Go back to OKEx, then go to 'Exchange'. Boom! What a view! The constantly flicking figures might be a bit scary, but relax, let's get our heads around this.
In the right column there is a search bar, now make sure "BTC" is selected as we are trading BTC to altcoin pair. Click on it and type in "DIA", you should see DIA/BTC, select that pair and you should see a price chart of DIA/BTC in the middle of the page.
Below there is a box with a green button that says "Buy DIA", inside of the box, choose the "Market" tab here as that is the most straight-forward type of buying orders. You can either type in your amount or choose what portion of your deposit you would like to spend on buying, by clicking on the percentage buttons. When you have confirmed everything, click "Buy DIA". Voila! You have finally bought DIA!
But we are not done yet, since DIA is an altcoin we need to transfer our BTC to an exchange that DIA can be traded, here we will use KuCoin as our exchange. KuCoin is a popular exchange to trade altcoins and it has a large number of tradable altcoins pairs. Use the link below to register your new account.
KuCoin is a cryptocurrency exchange based in the Seychelles (previously Hong Kong). Launched in September 2017, KuCoin claims to have 5 million users from over 200 countries and regions. Often known as the People’s Exchange, KuCoin now offers crypto-related services like crypto-to-crypto, fiat-to-crypto, futures trading, staking, lending and so forth. The exchange has one of the world’s most impressive trading pair selections, with more than 250 supported coins and 440 trading pairs. KuCoin was backed by two giant traditional venture capitals when launching - IDG Capital and Matrix Partners. The exchange also announced a USD 20 million round A funding from them at the end of 2018.US-investors are not listed as prohibited from trading. If you are a US-investor, however, you should still always analyse yourself whether your home state imposes any obstacles for your foreign cryptocurrency trading.
After going through a similar process as we've done before with UpHold, you will be advised to set up 2FA authentication as well, finish it as it adds extra security to your account.
Step 4: Deposit BTC to exchange
Depends on the policies of the exchange you might be required to go through another KYC process, this should usually take you from 30 minutes to possibly a few days maximum. Though the process should be straight-forward and easy to follow. Once you're done with it you should have full access to your exchange wallet.
If this is your first time making a crypto deposit, the screen here may look a bit scary. But don't worry, it's basically simpler than making a bank transfer. At the box on the right, you will see a string of random numbers saying 'BTC address', this is a unique public address of your BTC wallet at KuCoin and you can receive BTC by giving this address to the person to send you the funds. Since we are now transferring our previously bought BTC on UpHold to this wallet, click on 'Copy Address' or right-click on the full address and click copy to grab this address to your clipboard.
Now head back to UpHold, go to the Transact screen and click on BTC on the "From" field, choose the amount you wan to send and on the "To" field choose BTC under "Crypto Network", then click "Preview withdraw".
On the next screen, paste the wallet address from your clipboard, for security consideration you should always check if both addresses are matching. It is known that there are certain computer malware that would alter the content in your clipboard into another wallet address and you will be essentially sending funds to another person.
After reviewing, click 'Confirm' to proceed, you should receive a confirmation email instantly, click on the confirmation link in the email and your coins are on the way to KuCoin!
Now go back to KuCoin and head to your exchange wallets, don't worry if you haven't seen your deposit here. It is probably still being verified in the blockchain network and it should take a few minutes for your coins to arrive. Depending on the network traffic condition of the Bitcoin network, during busy times it may take even longer.
You should receive a confirmation notification from KuCoin once your BTC has arrived. And you are now finally ready to purchase DIA!
Step 5: Trade DIA
Go back to KuCoin, then go to 'Exchange'. Boom! What a view! The constantly flicking figures might be a bit scary, but relax, let's get our heads around this.
In the right column there is a search bar, now make sure "BTC" is selected as we are trading BTC to altcoin pair. Click on it and type in "DIA", you should see DIA/BTC, select that pair and you should see a price chart of DIA/BTC in the middle of the page.
Below there is a box with a green button that says "Buy DIA", inside of the box, choose the "Market" tab here as that is the most straight-forward type of buying orders. You can either type in your amount or choose what portion of your deposit you would like to spend on buying, by clicking on the percentage buttons. When you have confirmed everything, click "Buy DIA". Voila! You have finally bought DIA!
But we are not done yet, since DIA is an altcoin we need to transfer our BTC to an exchange that DIA can be traded, here we will use Binance as our exchange. Binance is a popular exchange to trade altcoins and it has a large number of tradable altcoins pairs. Use the link below to register your new account.
Binance is a popular cryptocurrency exchange which was started in China but then moved their headquarters to the crypto-friendly Island of Malta in the EU. Binance is popular for its crypto to crypto exchange services. Binance exploded onto the scene in the mania of 2017 and has since gone on to become the top crypto exchange in the world. Unfortunately, Binance does not allow US investors so we recommend you to sign up on other exchanges we recommend on this page.
After going through a similar process as we've done before with UpHold, you will be advised to set up 2FA authentication as well, finish it as it adds extra security to your account.
Step 4: Deposit BTC to exchange
Depends on the policies of the exchange you might be required to go through another KYC process, this should usually take you from 30 minutes to possibly a few days maximum. Though the process should be straight-forward and easy to follow. Once you're done with it you should have full access to your exchange wallet.
If this is your first time making a crypto deposit, the screen here may look a bit scary. But don't worry, it's basically simpler than making a bank transfer. At the box on the right, you will see a string of random numbers saying 'BTC address', this is a unique public address of your BTC wallet at Binance and you can receive BTC by giving this address to the person to send you the funds. Since we are now transferring our previously bought BTC on UpHold to this wallet, click on 'Copy Address' or right-click on the full address and click copy to grab this address to your clipboard.
Now head back to UpHold, go to the Transact screen and click on BTC on the "From" field, choose the amount you wan to send and on the "To" field choose BTC under "Crypto Network", then click "Preview withdraw".
On the next screen, paste the wallet address from your clipboard, for security consideration you should always check if both addresses are matching. It is known that there are certain computer malware that would alter the content in your clipboard into another wallet address and you will be essentially sending funds to another person.
After reviewing, click 'Confirm' to proceed, you should receive a confirmation email instantly, click on the confirmation link in the email and your coins are on the way to Binance!
Now go back to Binance and head to your exchange wallets, don't worry if you haven't seen your deposit here. It is probably still being verified in the blockchain network and it should take a few minutes for your coins to arrive. Depending on the network traffic condition of the Bitcoin network, during busy times it may take even longer.
You should receive a confirmation notification from Binance once your BTC has arrived. And you are now finally ready to purchase DIA!
Step 5: Trade DIA
Go back to Binance, then go to 'Exchange'. Boom! What a view! The constantly flicking figures might be a bit scary, but relax, let's get our heads around this.
In the right column there is a search bar, now make sure "BTC" is selected as we are trading BTC to altcoin pair. Click on it and type in "DIA", you should see DIA/BTC, select that pair and you should see a price chart of DIA/BTC in the middle of the page.
Below there is a box with a green button that says "Buy DIA", inside of the box, choose the "Market" tab here as that is the most straight-forward type of buying orders. You can either type in your amount or choose what portion of your deposit you would like to spend on buying, by clicking on the percentage buttons. When you have confirmed everything, click "Buy DIA". Voila! You have finally bought DIA!
But we are not done yet, since DIA is an altcoin we need to transfer our BTC to an exchange that DIA can be traded, here we will use HotBit as our exchange. HotBit is a popular exchange to trade altcoins and it has a large number of tradable altcoins pairs. Use the link below to register your new account.
Founded in 2018 and holding Estonian MTR licence, American MSB licence, an Australian AUSTRAC licence and a Canadian MSB licence,HotBit cryptocurrency exchange is known as a cryptocurrency trading platofrm that continues to develop and integrate various forms of businesses such as spot trading, financial derivatives, cryptocurrency investment and DAPP into one platform. Hotbit allows US investors right now. Currently, Hotbit’s businesses covers more than 210 countries and areas. Based on its globalized and unified strategies, HotBit continues to focus on world's emerging markets such as Russia, Turkey and southeastern Asia markets, and was ranked one of the top 3 most welcomed exchanges by Russian media in 2019.
After going through a similar process as we've done before with UpHold, you will be advised to set up 2FA authentication as well, finish it as it adds extra security to your account.
Step 4: Deposit BTC to exchange
Depends on the policies of the exchange you might be required to go through another KYC process, this should usually take you from 30 minutes to possibly a few days maximum. Though the process should be straight-forward and easy to follow. Once you're done with it you should have full access to your exchange wallet.
If this is your first time making a crypto deposit, the screen here may look a bit scary. But don't worry, it's basically simpler than making a bank transfer. At the box on the right, you will see a string of random numbers saying 'BTC address', this is a unique public address of your BTC wallet at HotBit and you can receive BTC by giving this address to the person to send you the funds. Since we are now transferring our previously bought BTC on UpHold to this wallet, click on 'Copy Address' or right-click on the full address and click copy to grab this address to your clipboard.
Now head back to UpHold, go to the Transact screen and click on BTC on the "From" field, choose the amount you wan to send and on the "To" field choose BTC under "Crypto Network", then click "Preview withdraw".
On the next screen, paste the wallet address from your clipboard, for security consideration you should always check if both addresses are matching. It is known that there are certain computer malware that would alter the content in your clipboard into another wallet address and you will be essentially sending funds to another person.
After reviewing, click 'Confirm' to proceed, you should receive a confirmation email instantly, click on the confirmation link in the email and your coins are on the way to HotBit!
Now go back to HotBit and head to your exchange wallets, don't worry if you haven't seen your deposit here. It is probably still being verified in the blockchain network and it should take a few minutes for your coins to arrive. Depending on the network traffic condition of the Bitcoin network, during busy times it may take even longer.
You should receive a confirmation notification from HotBit once your BTC has arrived. And you are now finally ready to purchase DIA!
Step 5: Trade DIA
Go back to HotBit, then go to 'Exchange'. Boom! What a view! The constantly flicking figures might be a bit scary, but relax, let's get our heads around this.
In the right column there is a search bar, now make sure "BTC" is selected as we are trading BTC to altcoin pair. Click on it and type in "DIA", you should see DIA/BTC, select that pair and you should see a price chart of DIA/BTC in the middle of the page.
Below there is a box with a green button that says "Buy DIA", inside of the box, choose the "Market" tab here as that is the most straight-forward type of buying orders. You can either type in your amount or choose what portion of your deposit you would like to spend on buying, by clicking on the percentage buttons. When you have confirmed everything, click "Buy DIA". Voila! You have finally bought DIA!
But we are not done yet, since DIA is an altcoin we need to transfer our BTC to an exchange that DIA can be traded, here we will use Poloniex as our exchange. Poloniex is a popular exchange to trade altcoins and it has a large number of tradable altcoins pairs. Use the link below to register your new account.
Poloniex is a centralized cryptocurrency exchange for both experienced and amateur cryptocurrency traders. It offers a range of crypto markets, advanced trade types, as well as margin trading and crypto lending, which makes it a convenient place for traders from all walks of life. Poloniex is a good and very popular exchange that offers very low trading fees, good customer support, easy registration process, multiple cryptocurrencies, and has other amazing features. As Poloniex is a US cryptocurrency exchange, US-investors may of course trade there. But US-investors should in any event do their own independent assessment of any problems arising from their state residency. In particular, investors from the state of New York are often restricted from trading at many cryptocurrency exchanges.
After going through a similar process as we've done before with UpHold, you will be advised to set up 2FA authentication as well, finish it as it adds extra security to your account.
Step 4: Deposit BTC to exchange
Depends on the policies of the exchange you might be required to go through another KYC process, this should usually take you from 30 minutes to possibly a few days maximum. Though the process should be straight-forward and easy to follow. Once you're done with it you should have full access to your exchange wallet.
If this is your first time making a crypto deposit, the screen here may look a bit scary. But don't worry, it's basically simpler than making a bank transfer. At the box on the right, you will see a string of random numbers saying 'BTC address', this is a unique public address of your BTC wallet at Poloniex and you can receive BTC by giving this address to the person to send you the funds. Since we are now transferring our previously bought BTC on UpHold to this wallet, click on 'Copy Address' or right-click on the full address and click copy to grab this address to your clipboard.
Now head back to UpHold, go to the Transact screen and click on BTC on the "From" field, choose the amount you wan to send and on the "To" field choose BTC under "Crypto Network", then click "Preview withdraw".
On the next screen, paste the wallet address from your clipboard, for security consideration you should always check if both addresses are matching. It is known that there are certain computer malware that would alter the content in your clipboard into another wallet address and you will be essentially sending funds to another person.
After reviewing, click 'Confirm' to proceed, you should receive a confirmation email instantly, click on the confirmation link in the email and your coins are on the way to Poloniex!
Now go back to Poloniex and head to your exchange wallets, don't worry if you haven't seen your deposit here. It is probably still being verified in the blockchain network and it should take a few minutes for your coins to arrive. Depending on the network traffic condition of the Bitcoin network, during busy times it may take even longer.
You should receive a confirmation notification from Poloniex once your BTC has arrived. And you are now finally ready to purchase DIA!
Step 5: Trade DIA
Go back to Poloniex, then go to 'Exchange'. Boom! What a view! The constantly flicking figures might be a bit scary, but relax, let's get our heads around this.
In the right column there is a search bar, now make sure "BTC" is selected as we are trading BTC to altcoin pair. Click on it and type in "DIA", you should see DIA/BTC, select that pair and you should see a price chart of DIA/BTC in the middle of the page.
Below there is a box with a green button that says "Buy DIA", inside of the box, choose the "Market" tab here as that is the most straight-forward type of buying orders. You can either type in your amount or choose what portion of your deposit you would like to spend on buying, by clicking on the percentage buttons. When you have confirmed everything, click "Buy DIA". Voila! You have finally bought DIA!
But we are not done yet, since DIA is an altcoin we need to transfer our BTC to an exchange that DIA can be traded, here we will use BitMax as our exchange. BitMax is a popular exchange to trade altcoins and it has a large number of tradable altcoins pairs. Use the link below to register your new account.
BitMax is – like so many other exchanges – from Singapore. The platform launched in August 2018 and is available at two different domains: BitMax.io and BTMX.com. The team behind the exchange is spear-headed by three individuals: George Cao (Co-founder and CEO of BitMax.io) , Ariel Ling (Co-founder and COO of BitMax.io), and Shane Molidor (Global Head of Business Development at BitMax.io). These individuals all have experience from asset management, banking and finance. BitMax today supports trading in a quite decent number of cryptocurrencies. You can find all of the biggest ones here, and the platform has 190+ trading pairs and 40 different margin trading pairs. BitMax does not accept US-investors on its platform.
After going through a similar process as we've done before with UpHold, you will be advised to set up 2FA authentication as well, finish it as it adds extra security to your account.
Step 4: Deposit BTC to exchange
Depends on the policies of the exchange you might be required to go through another KYC process, this should usually take you from 30 minutes to possibly a few days maximum. Though the process should be straight-forward and easy to follow. Once you're done with it you should have full access to your exchange wallet.
If this is your first time making a crypto deposit, the screen here may look a bit scary. But don't worry, it's basically simpler than making a bank transfer. At the box on the right, you will see a string of random numbers saying 'BTC address', this is a unique public address of your BTC wallet at BitMax and you can receive BTC by giving this address to the person to send you the funds. Since we are now transferring our previously bought BTC on UpHold to this wallet, click on 'Copy Address' or right-click on the full address and click copy to grab this address to your clipboard.
Now head back to UpHold, go to the Transact screen and click on BTC on the "From" field, choose the amount you wan to send and on the "To" field choose BTC under "Crypto Network", then click "Preview withdraw".
On the next screen, paste the wallet address from your clipboard, for security consideration you should always check if both addresses are matching. It is known that there are certain computer malware that would alter the content in your clipboard into another wallet address and you will be essentially sending funds to another person.
After reviewing, click 'Confirm' to proceed, you should receive a confirmation email instantly, click on the confirmation link in the email and your coins are on the way to BitMax!
Now go back to BitMax and head to your exchange wallets, don't worry if you haven't seen your deposit here. It is probably still being verified in the blockchain network and it should take a few minutes for your coins to arrive. Depending on the network traffic condition of the Bitcoin network, during busy times it may take even longer.
You should receive a confirmation notification from BitMax once your BTC has arrived. And you are now finally ready to purchase DIA!
Step 5: Trade DIA
Go back to BitMax, then go to 'Exchange'. Boom! What a view! The constantly flicking figures might be a bit scary, but relax, let's get our heads around this.
In the right column there is a search bar, now make sure "BTC" is selected as we are trading BTC to altcoin pair. Click on it and type in "DIA", you should see DIA/BTC, select that pair and you should see a price chart of DIA/BTC in the middle of the page.
Below there is a box with a green button that says "Buy DIA", inside of the box, choose the "Market" tab here as that is the most straight-forward type of buying orders. You can either type in your amount or choose what portion of your deposit you would like to spend on buying, by clicking on the percentage buttons. When you have confirmed everything, click "Buy DIA". Voila! You have finally bought DIA!
Apart from the exchange(s) above, there are a few popular crypto exchanges where they have decent daily trading volumes and a huge user base. This will ensure you will be able to sell your coins at any time and the fees will usually be lower. It is suggested that you also register on these exchanges since once DIA gets listed there it will attract a large amount of trading volumes from the users there, that means you will be having some great trading opportunities!
Huobi
Huobi is originally a Chinese crypto exchange. From what it seems, it has now registered in the Seychelles. This exchange is one of the six exchanges from the Seychelles. The liquidity at Huobi is impressive. The liquidity, together with its customer support that is open 24 hours a day 365 days a year and good security. If you sign up to Huobi using our link below, you will receive a series of welcome bonuses, as follows: 1. USDT 10 when you have registered and verified your profile, 2. USDT 50 when you have deposited/bought 100 USDT worth of tokens via Huobi OTC, and 3. A chance of up to USDT 60 when you have completed a minimum of 100 USDT worth of crypto-to-crypto trading. Huobi does not allow US-investors on its exchange.
MXC
Launched in Apr 2018, MXC is a centralized cryptocurrency exchange registered in Seychelles. It supports CNY, VND, USD, GBP, EUR, AUD deposit, and CNY, VND withdrawal. As far as we can tell, US-investors may trade at MXC. It offers trading in 242 coins and has 374 trading pairs. They are currently no. 7 in terms of the most supported cryptocurrencies compared to other spot trading exchanges according to Coingecko. Most importantly, MXC is ON TOP of the Decentralised Finance (DeFi) wave and constantly adding support for DeFi coins.
Last Step: Store DIA securely in hardware wallets
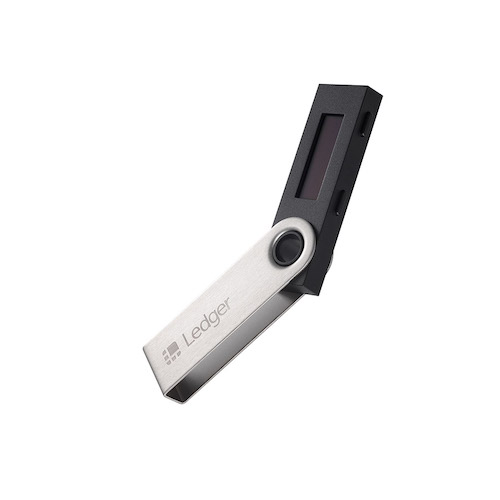
Ledger Nano S
- Easy to set up and friendly interface
- Can be used on desktops and laptops
- Lightweight and Portable
- Support most blockchains and wide range of (ERC-20/BEP-20) tokens
- Multiple languages available
- Built by a well-established company found in 2014 with great chip security
- Affordable price
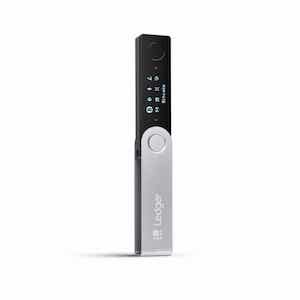
Ledger Nano X
- More powerful secure element chip (ST33) than Ledger Nano S
- Can be used on desktop or laptop, or even smartphone and tablet through Bluetooth integration
- Lightweight and Portable with built-in rechargeable battery
- Larger screen
- More storage space than Ledger Nano S
- Support most blockchains and wide range of (ERC-20/BEP-20) tokens
- Multiple languages available
- Built by a well-established company found in 2014 with great chip security
- Affordable price
If you are planning to keep("hodl" as some may say, basically misspelt "hold" which get popularised over time) your DIA for a considerable long time, you may want to explore ways of keeping it safe, although Binance is one of the safest cryptocurrency exchange there had been hacking incidents and funds were lost. Because of the very nature of the wallets in exchanges, they will be always online("Hot Wallets" as we call them), therefore exposing certain aspects of vulnerabilities. The safest way of storing your coins to date is always putting them into a type of "Cold Wallets", where the wallet will only have access to the blockchain(or simply "go online") when you send out funds, reducing the chances of hacking incidents. A paper wallet is a type of free cold wallet, it's basically an offline-generated pair of public and private address and you will have it written somewhere, and keep it safe. However, it is not durable and is susceptible to various hazards.
Hardware wallet here is definitely a better option of cold wallets. They are usually USB-enabled devices that store the key information of your wallet in a more durable way. They are built with military-level security and their firmware are constantly maintained by their manufacturers and thus extremely safe. Ledger Nano S and Ledger Nano X and are the most popular options in this category, these wallets cost around $50 to $100 depending on the features they are offering. If you are holding your assets these wallets are a good investment in our opinion.
Other useful tools for trading DIA
Encrypted Secure Connection
NordVPN
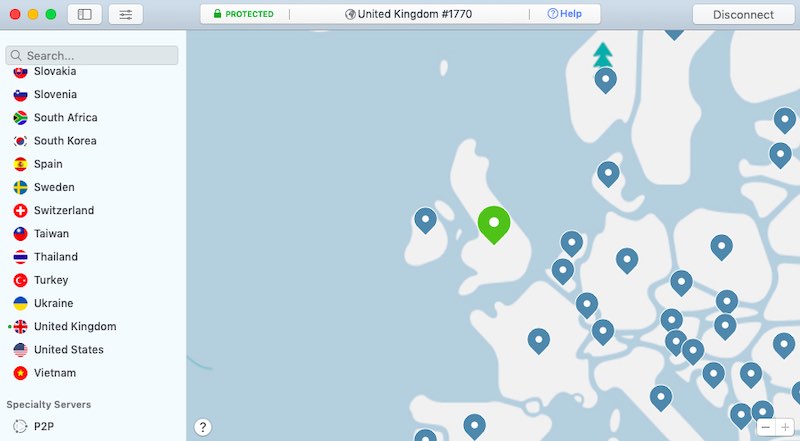
Because of the very nature of cryptocurrency – decentralised, it means that users are 100% responsible for handling their assets securely. While using hardware wallet allows you to store your cryptos in a safe place, using an encrypted VPN connection while you trade makes it harder for hackers to intercept or eavesdrop your sensitive information. Especially when you are trading on the go or in a public Wifi connection. NordVPN is one of the best paid (note: never use any free VPN services as they may sniff your data in return of free service) VPN services out there and it has been around for almost a decade. It offers military-grade encrypted connection and you can also opt-in to block malicious websites and ads with their CyberSec feature. You can choose to connect to 5000+ servers in 60+ countries base on your current location, which ensures you to always have a smooth and secure connection wherever you are. There is no bandwidth or data limits that means you can also use the service in your everyday routines such as streaming videos or downloading large files. Plus it is among the cheapest VPN services out there (only $3.49 per month).
Surfshark
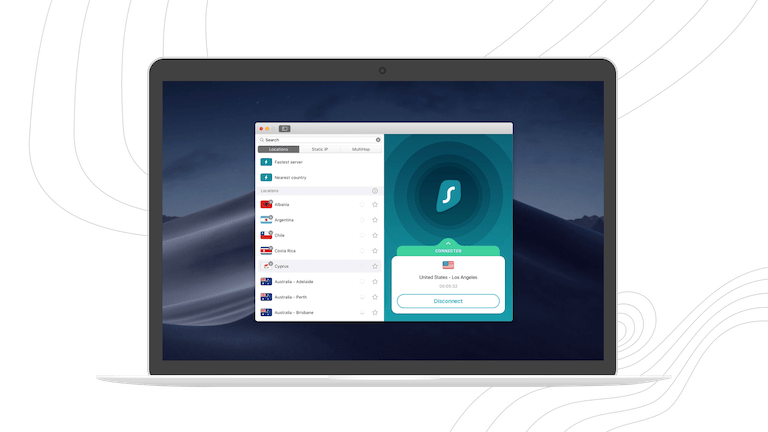
Surfshark is a much cheaper alternative if you are looking for a secure VPN connection. Although it’s a relatively new company, it has already 3200+ servers distributed in 65 countries. Apart from VPN it also has some other cool features including CleanWeb™, which actively blocks ads, trackers, malware and phishing attempts while you are surfing on your browser. Currently, Surfshark does not have any device limit so you can basically use it on as many devices as you want and even share the service with your friends and family. Use the signup link below to get an 81% discount(that’s a lot!!) at $2.49/month!
Atlas VPN
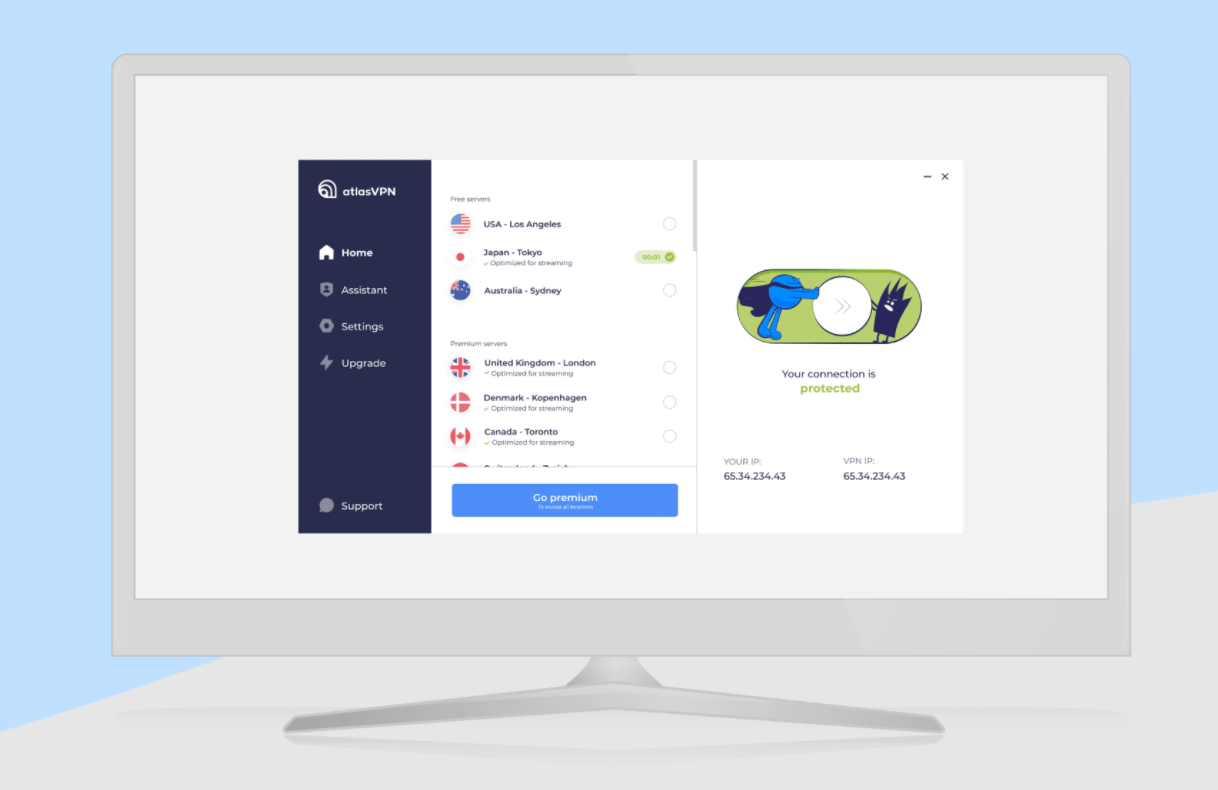
IT nomads created Atlas VPN after seeing a lack of top-notch service within the free VPNs field. Atlas VPN was designed for everyone to have free access to unrestricted content without any strings attached. Atlas VPN set out to be the first trustworthy free VPN armed with top-notch technology. Furthermore, even though Atlas VPN is the new kid on the block, their blog team’s reports have been covered by well-known outlets such as Forbes, Fox News, Washington Post, TechRadar and many others. Below are some of the feature highlights:
- Strong encryption
- Tracker blocker feature blocks dangerous websites, stops third-party cookies from tracking your browsing habits and prevents behavioural advertising.
- Data Breach Monitor finds out whether your personal data is safe.
- SafeSwap servers allow you to have many rotating IP addresses by connecting to a single server
- Best prices on the VPN market (only $1.39/month!!)
- No-log policy to keep your privacy safe
- Automatic Kill Switch to block your device or apps from accessing the internet if the connection fails
- Unlimited simultaneous connections.
- P2P support
Frequently Asked Questions
Can I buy DIA with cash?
There is no direct way to buy DIA with cash. However, you can use marketplaces such as LocalBitcoins to first purchase BTC, and finish the rest of the steps by transferring your BTC to respective AltCoin exchanges.
LocalBitcoins is a peer-to-peer Bitcoin exchange. It is a marketplace where users can buy and sell Bitcoins to and from each other. Users, called traders, create advertisements with the price and the payment method they want to offer. You can choose to buy from sellers from a certain nearby region on the platform. is after all a good place to go to buy Bitcoins when you can't find your desired payment methods anywhere else. But prices are usually higher on this platform and you have to do your due diligence to avoid getting scammed.
Are there any quick ways to buy DIA in Europe?
Yes, in fact, Europe is one of the easiest places to buy cryptos in general. There are even online banks which you can simply open an account and transfer money to exchanges such as Coinbase and Uphold.
Are there any alternative platforms to buy DIA or Bitcoin with credit cards?
Yes. is also a very easy to use platform for buying Bitcoin with credit cards. It is an instant cryptocurrency exchange that allows you to exchange crypto fast and buy it with a bank card. Its user interface is very easy to use and the buying steps are pretty self-explanatory.
DIA Price Prediction and Price Movement
We have seen some downward price movements over the past three months as DIA has dropped 0 percent. Though with its relatively large market capitalization, DIA maybe in the middle of a long price consolidation phase, in the case of a strong fundamentals, it would be likely that DIA may bounce back heavily and continue its next phase of upward movement. Therefore traders should spend some extra effort in researching DIA's fundamentals and still be cautious while trading this coin.
Please note that this analysis is purely base on DIA's historic price actions and is by no means financial advice. Traders should always do their own research and be extra careful while investing in cryptocurrencies.
Latest News for DIA
